When adding a Mail account on an iOS device specific details about the email account are necessary. cPanel includes a Mail Client Automatic Configuration Script that can be used with iOS for iPhone/iPad/iPod and MacOS.
This script will securely provide the necessary details of your email account, in an iOS/MacOS Configuration Profile, that you can easily install.
Following this guide will provide the step to use cPanel’s script to automatically set up an email account on your Apple device(s).
|
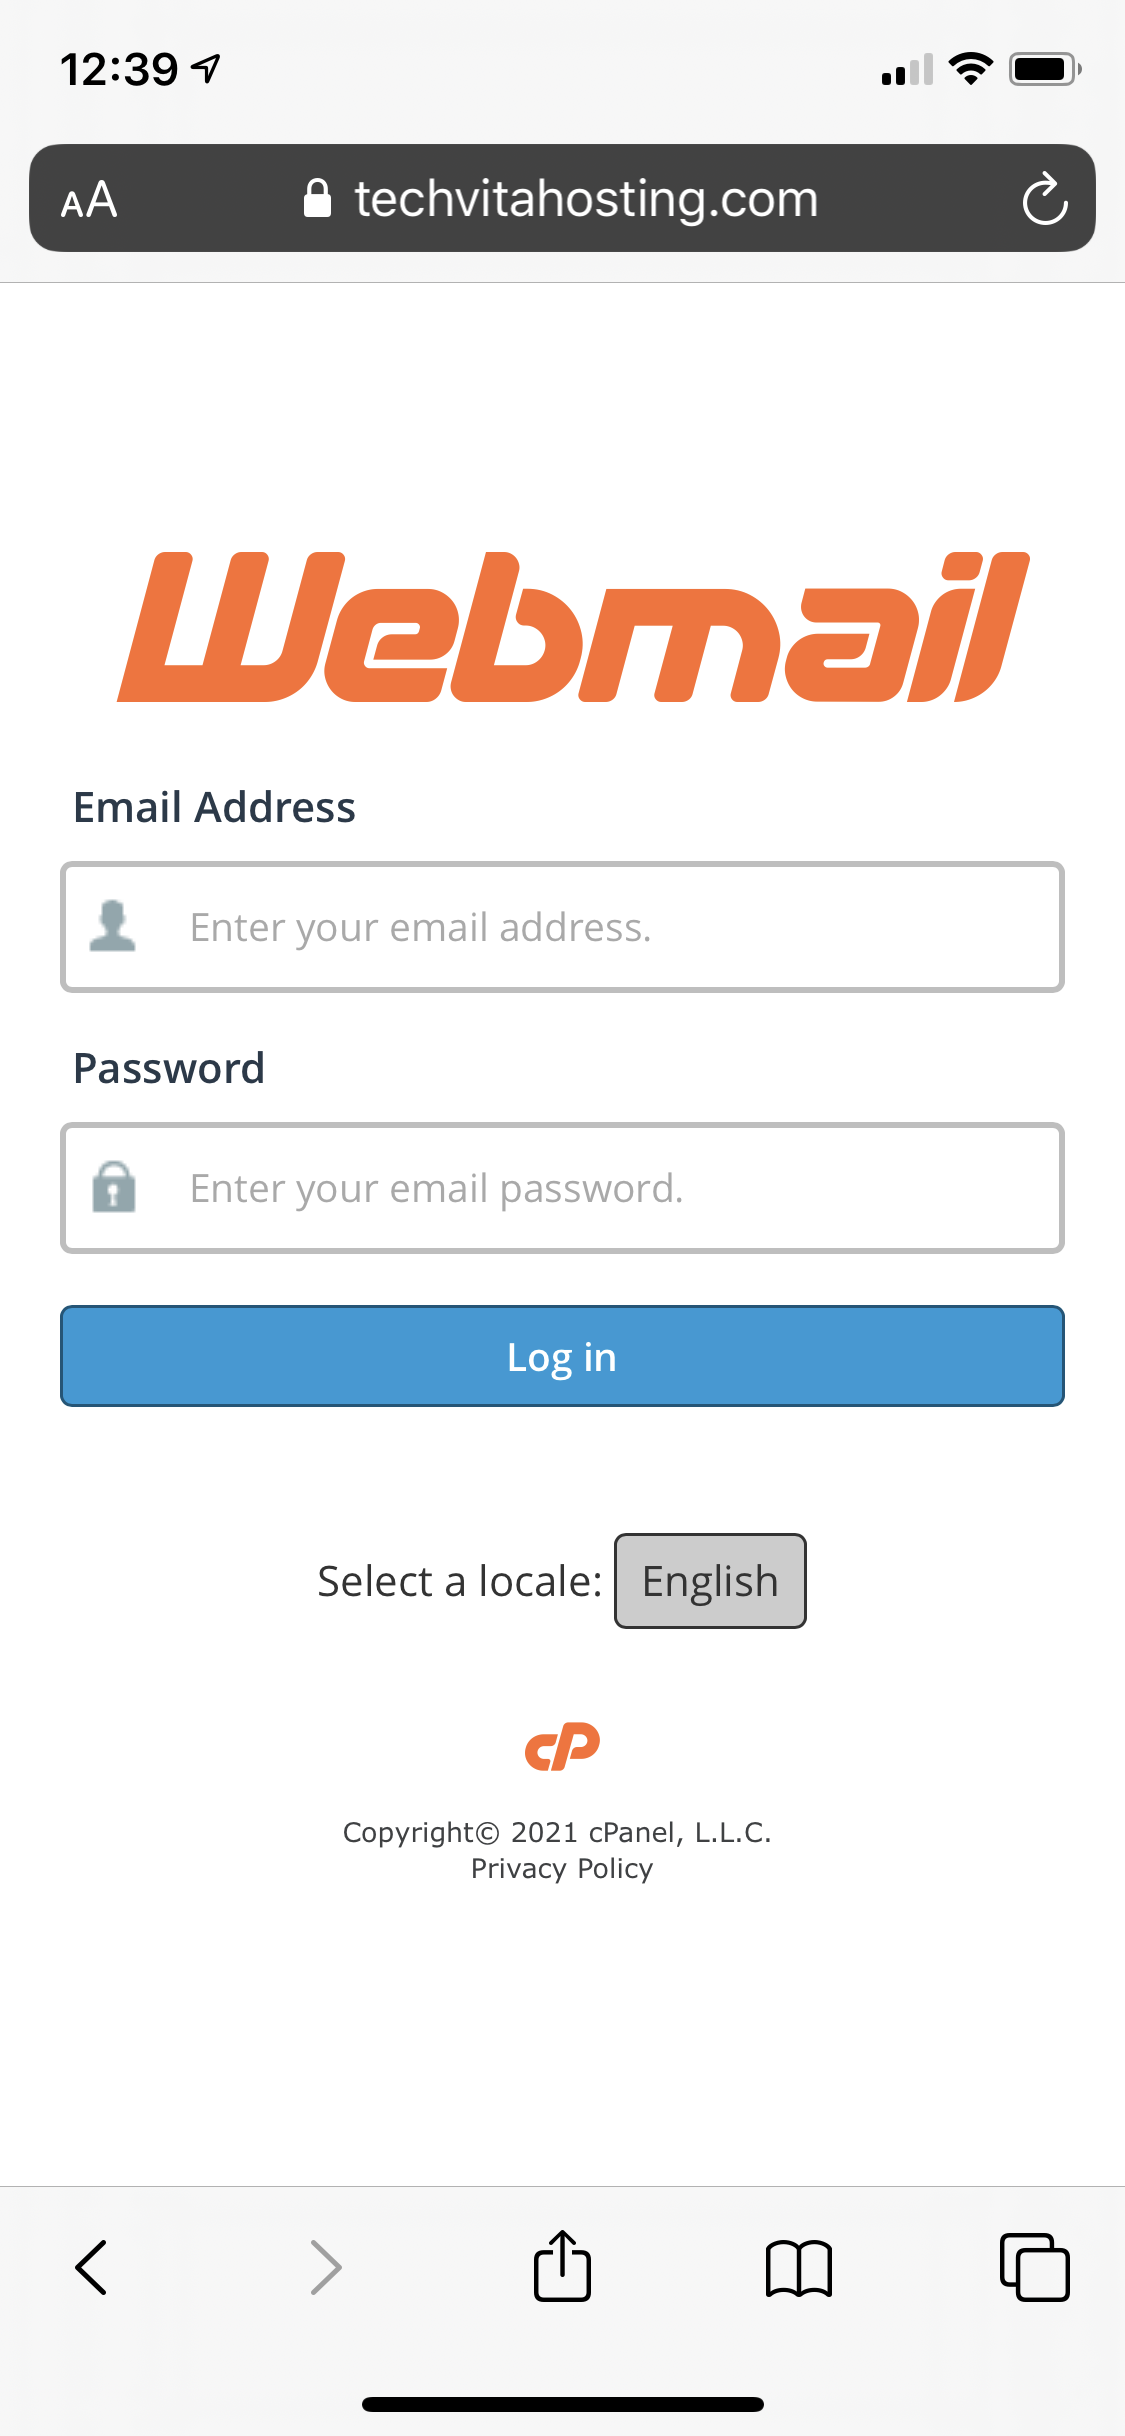
Step 1 On your Apple device, open Safari and navigate to our Webmail log in page (https://techvitahosting.com/webmail or https://webmail.techvitahosting.com) |
 |
|
Step 2 Log in with your email account (username) and password |
 |
|
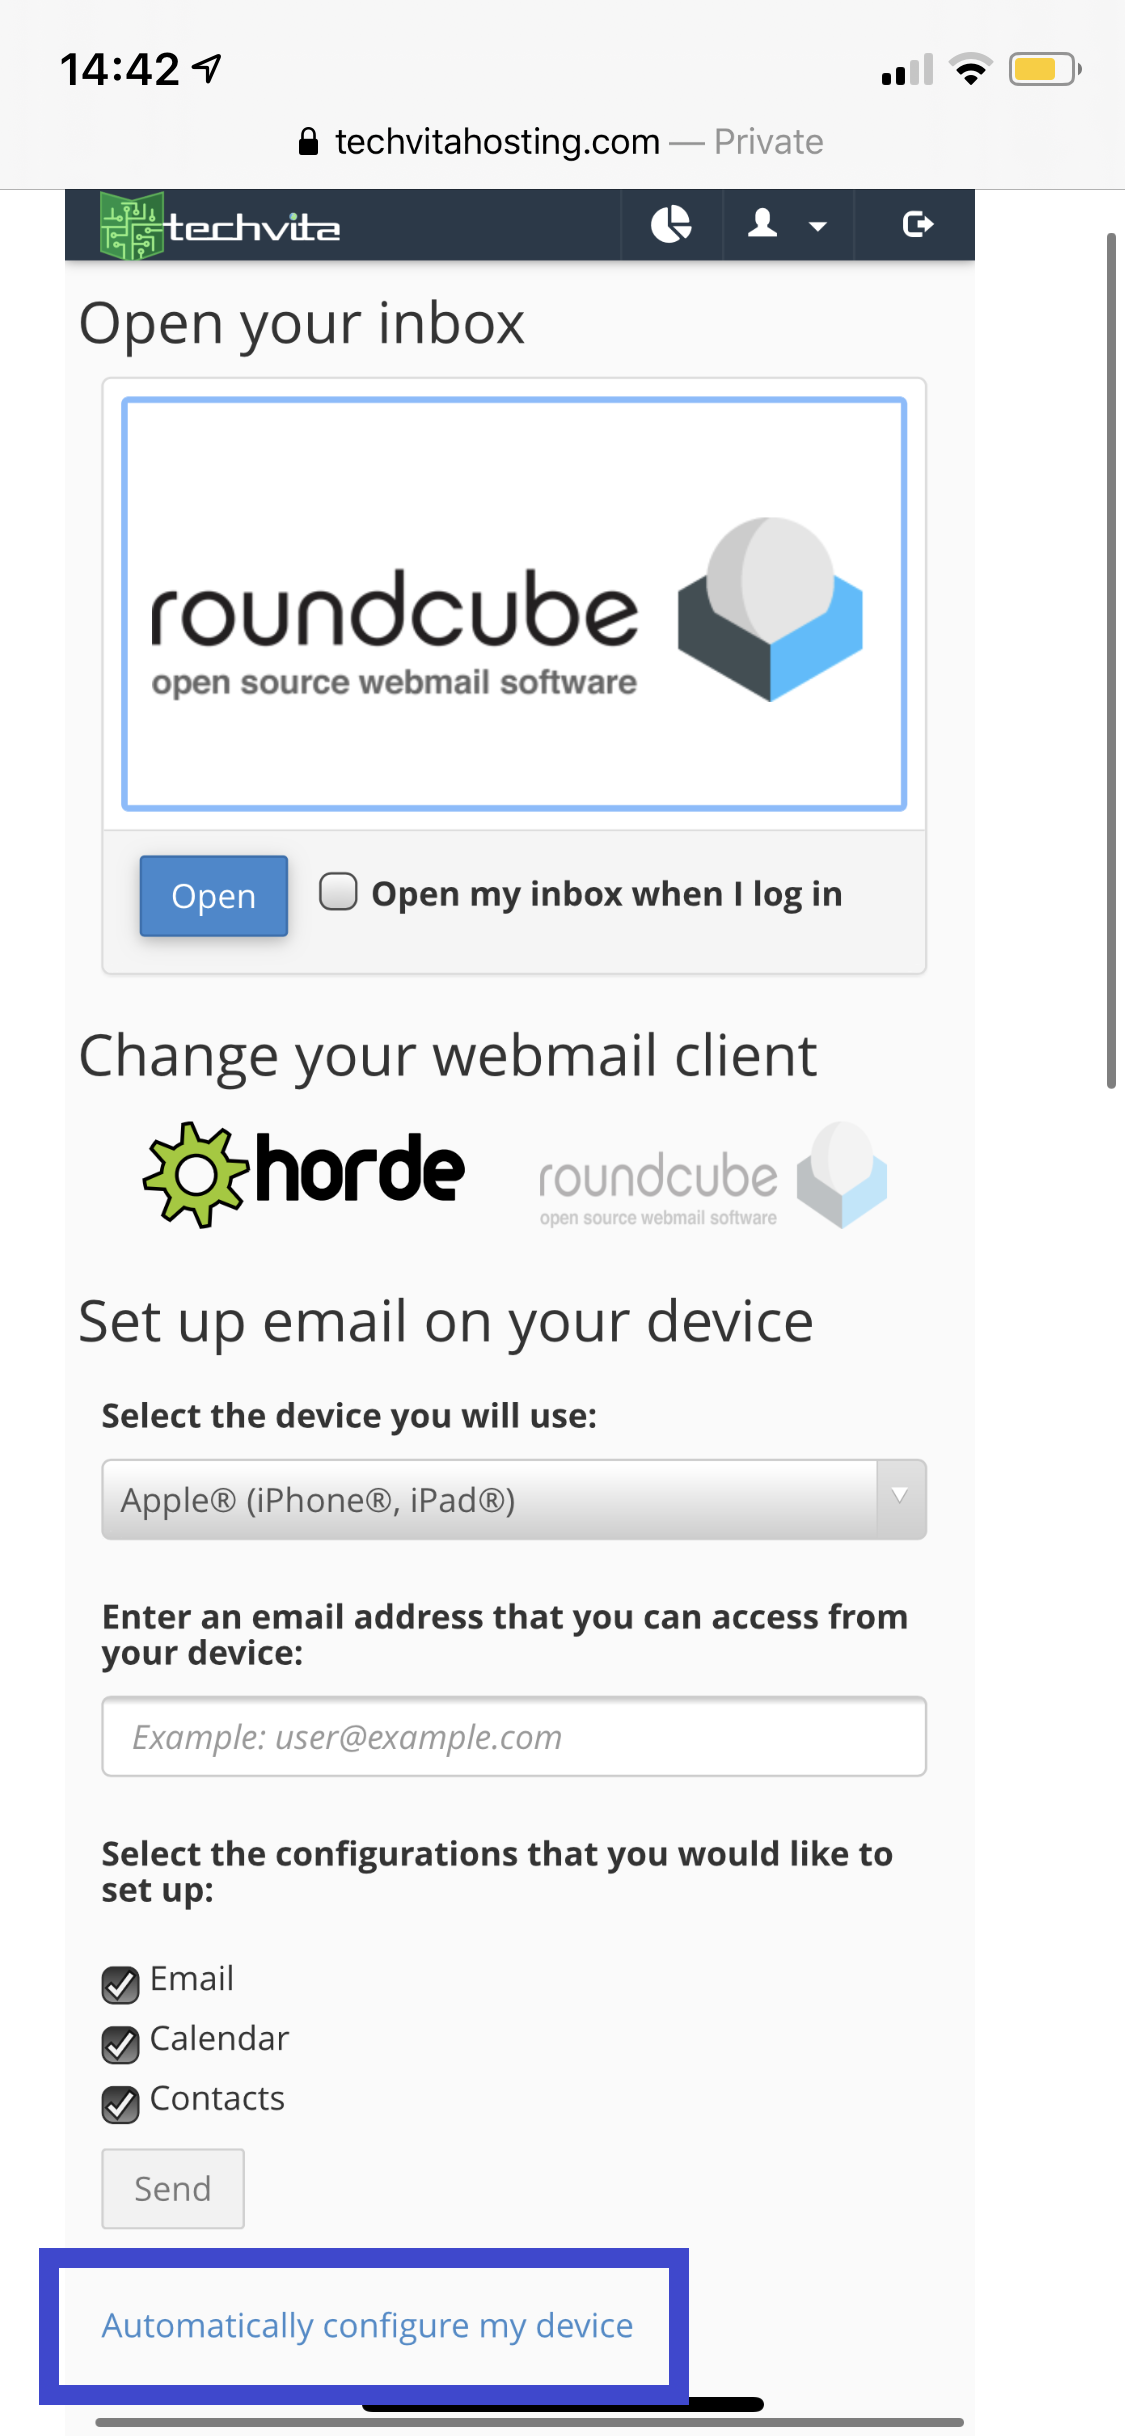
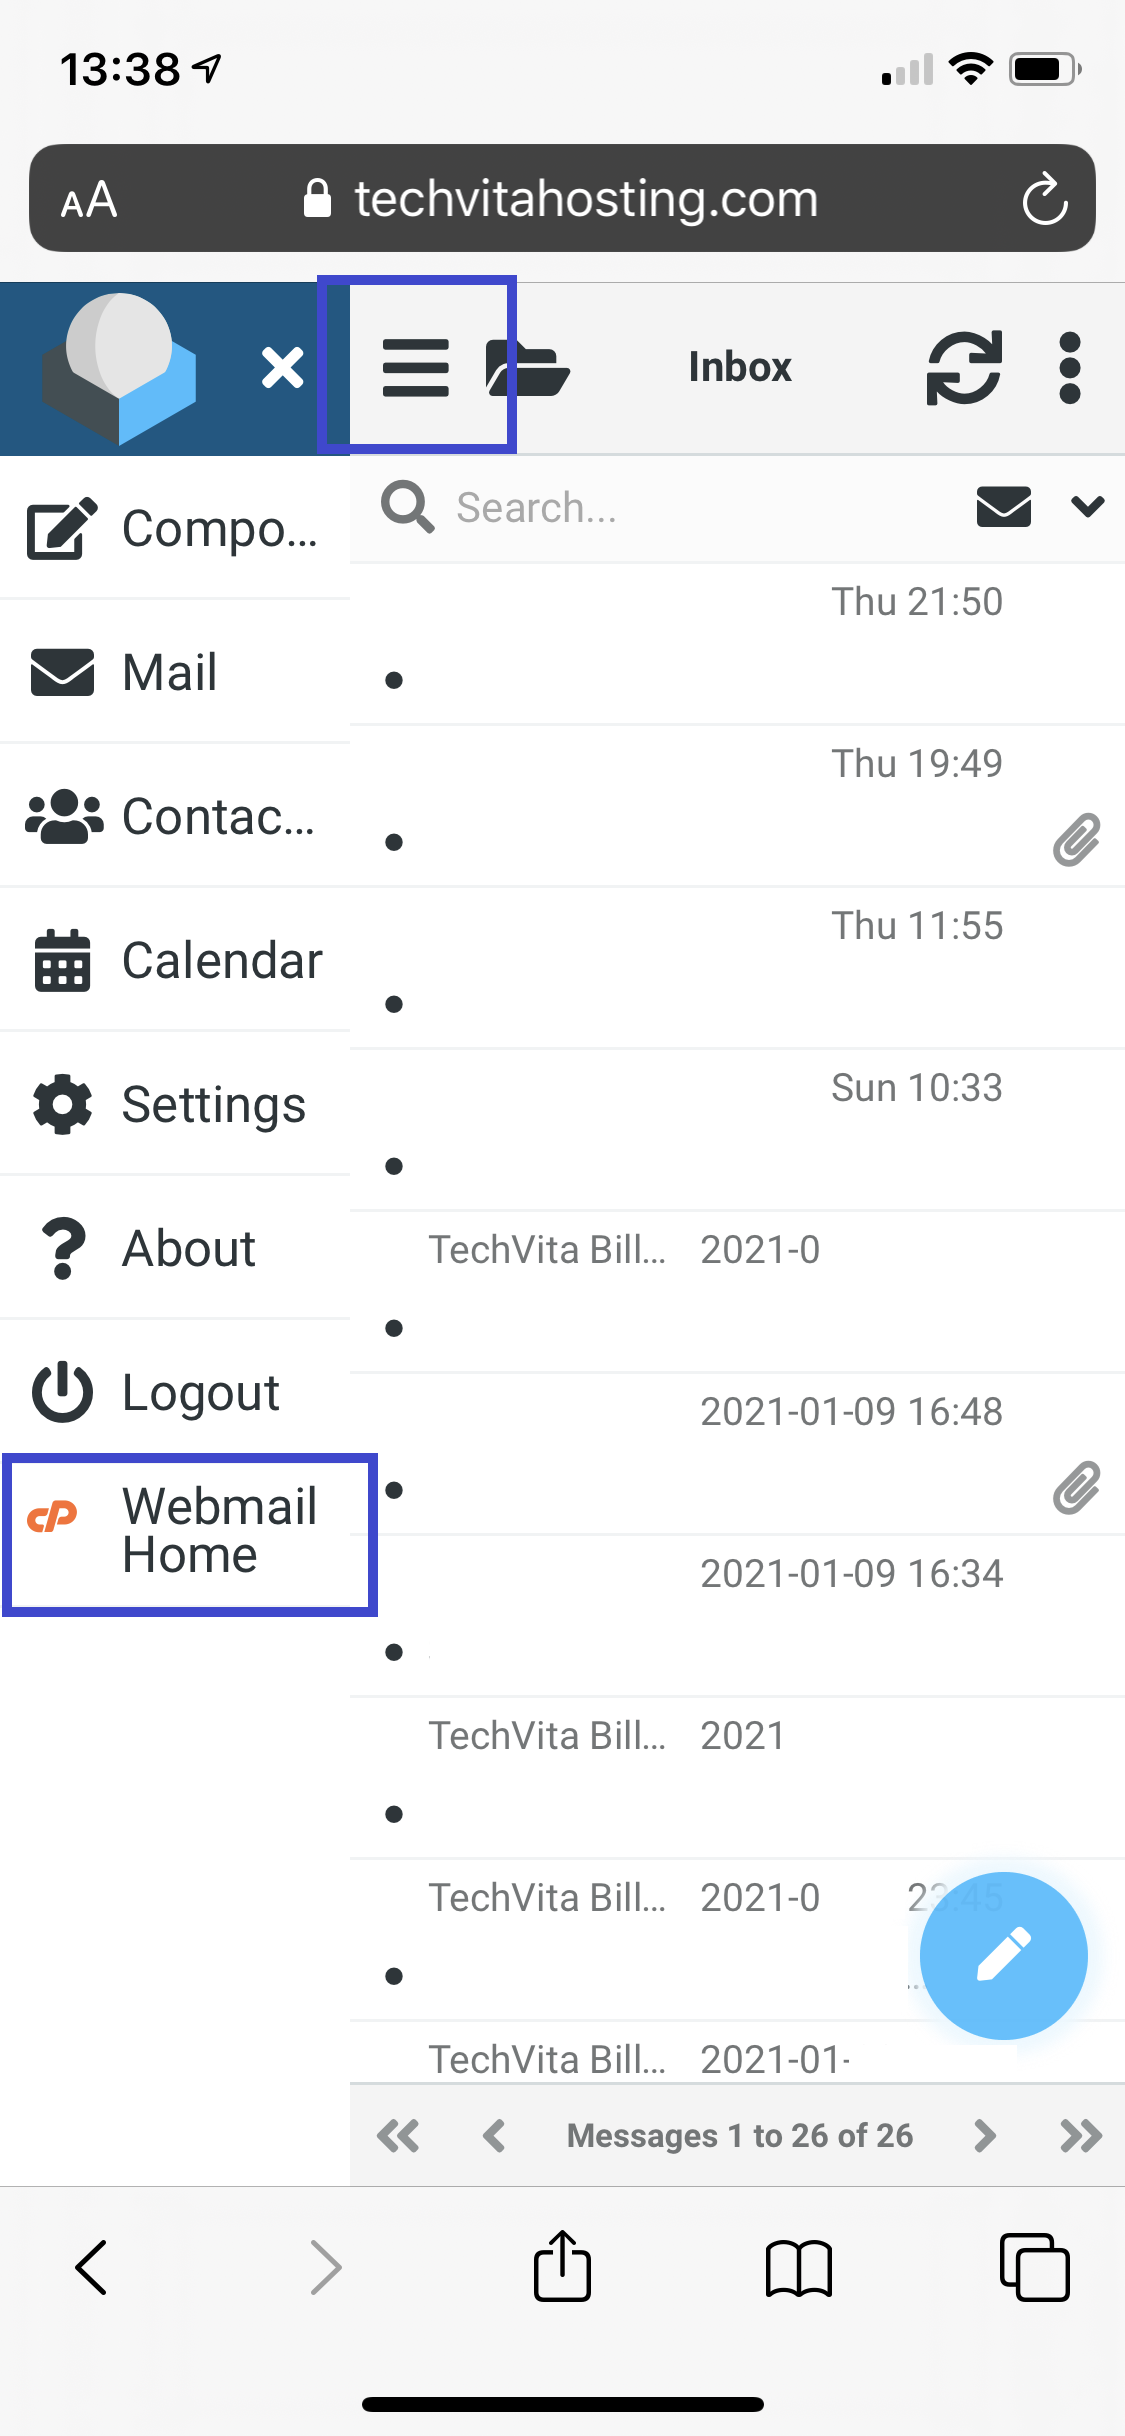
Step 3 Scroll down a little, not too much - you'll see an option to 'Automatically configure my device' If you are taken straight to your inbox, please click the 'burger menu' icon top left side, then tap on Webmail Home as illustrated here also |
  |
|
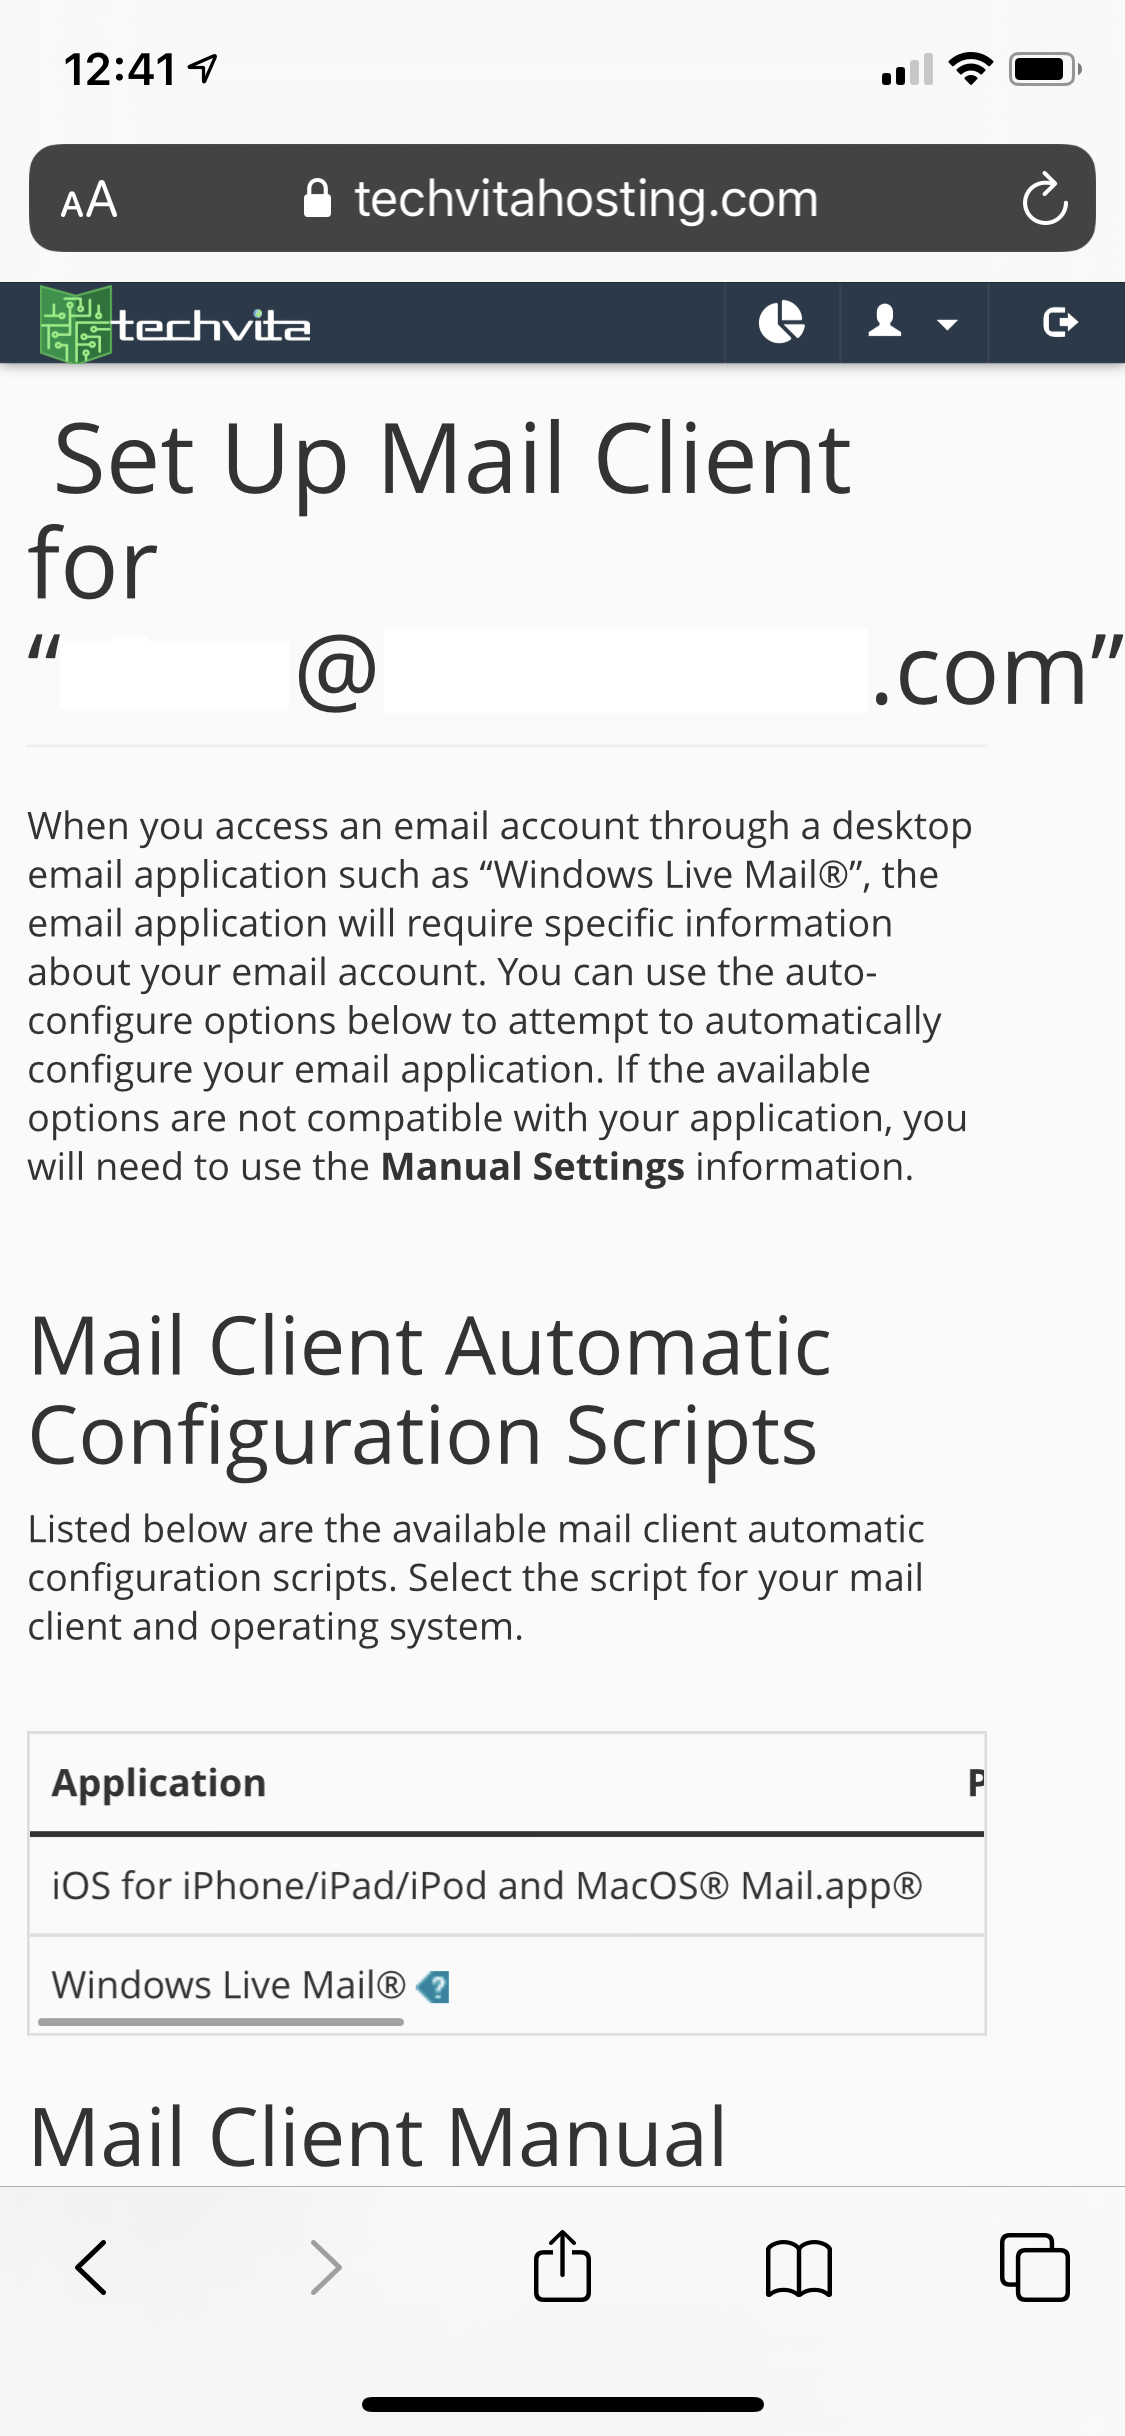
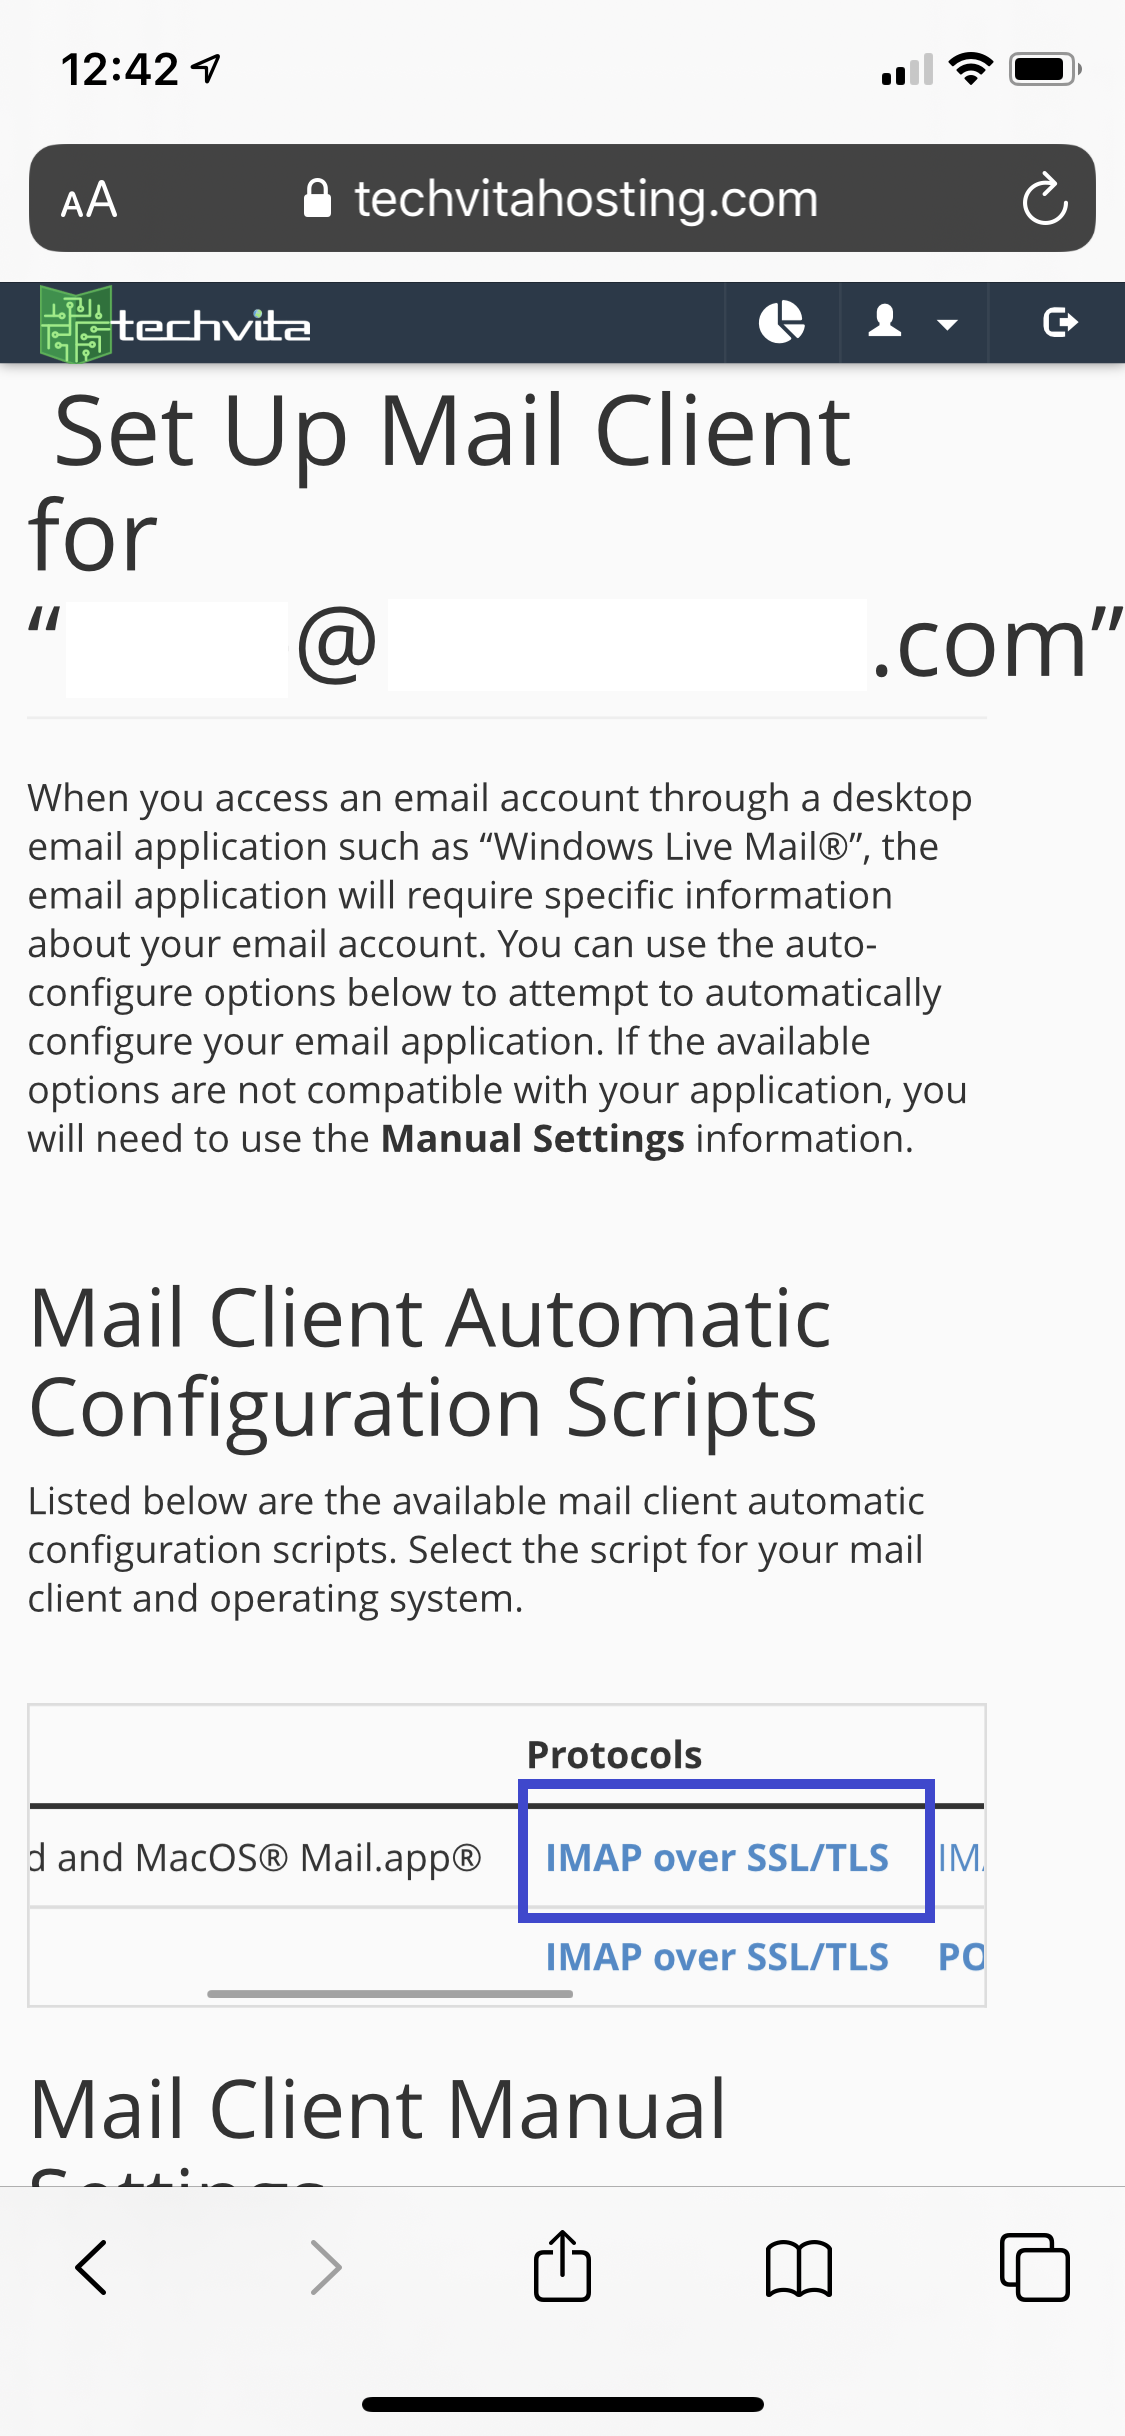
Step 4 Find 'iOS for iPhone/iPad/iPod and MacOS Mail.app' Tap on the IMAP over SSL/TLS link to the right to open the script. |
  |
|
Step 5 Tap Proceed to confirm that you want to run the script |
 |
|
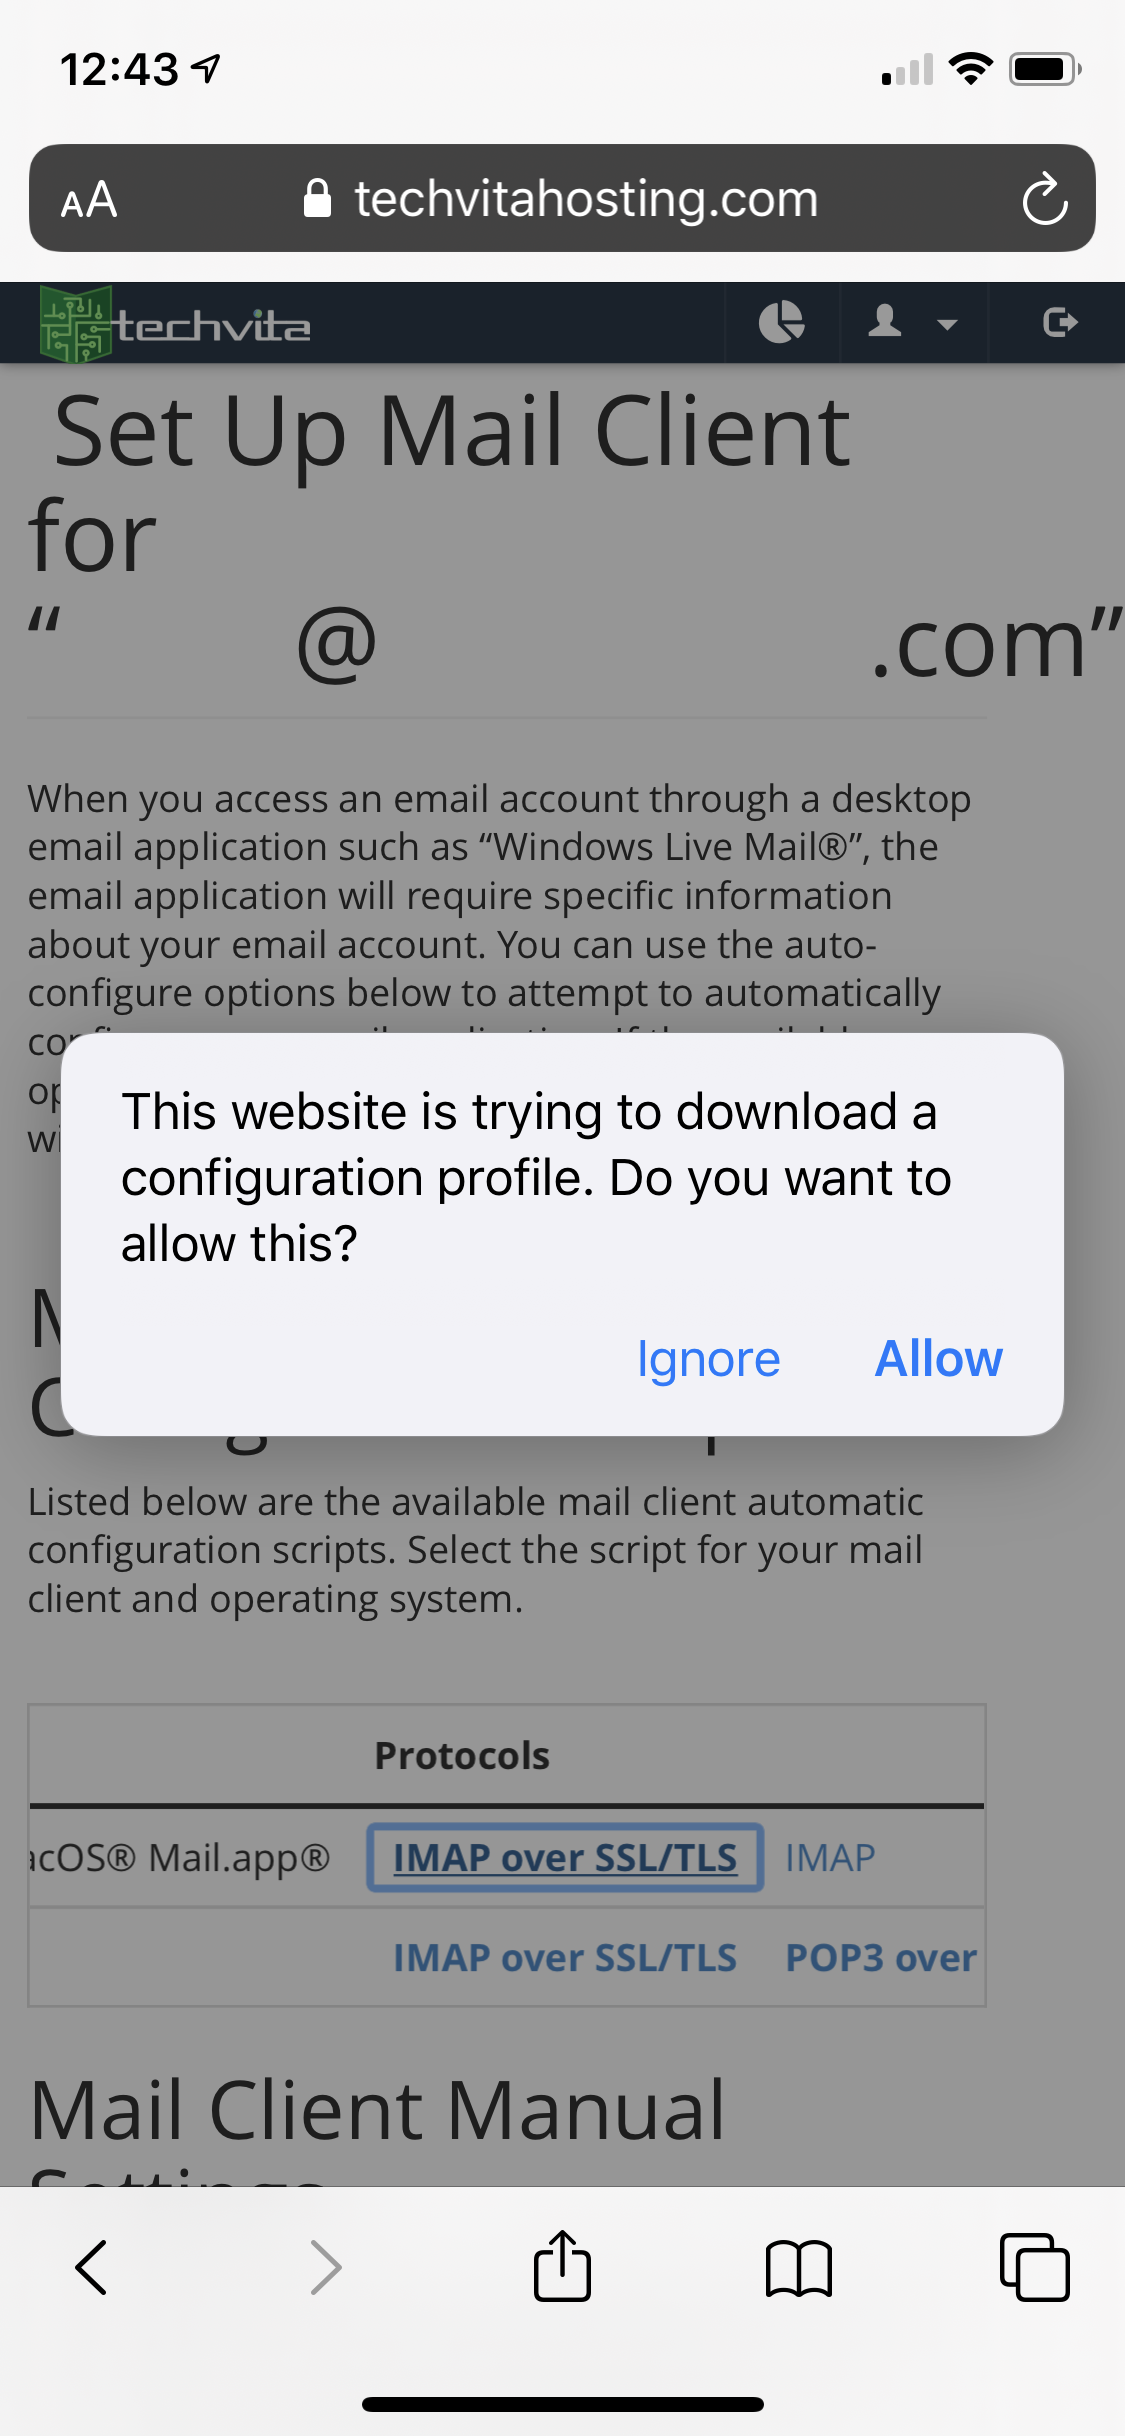
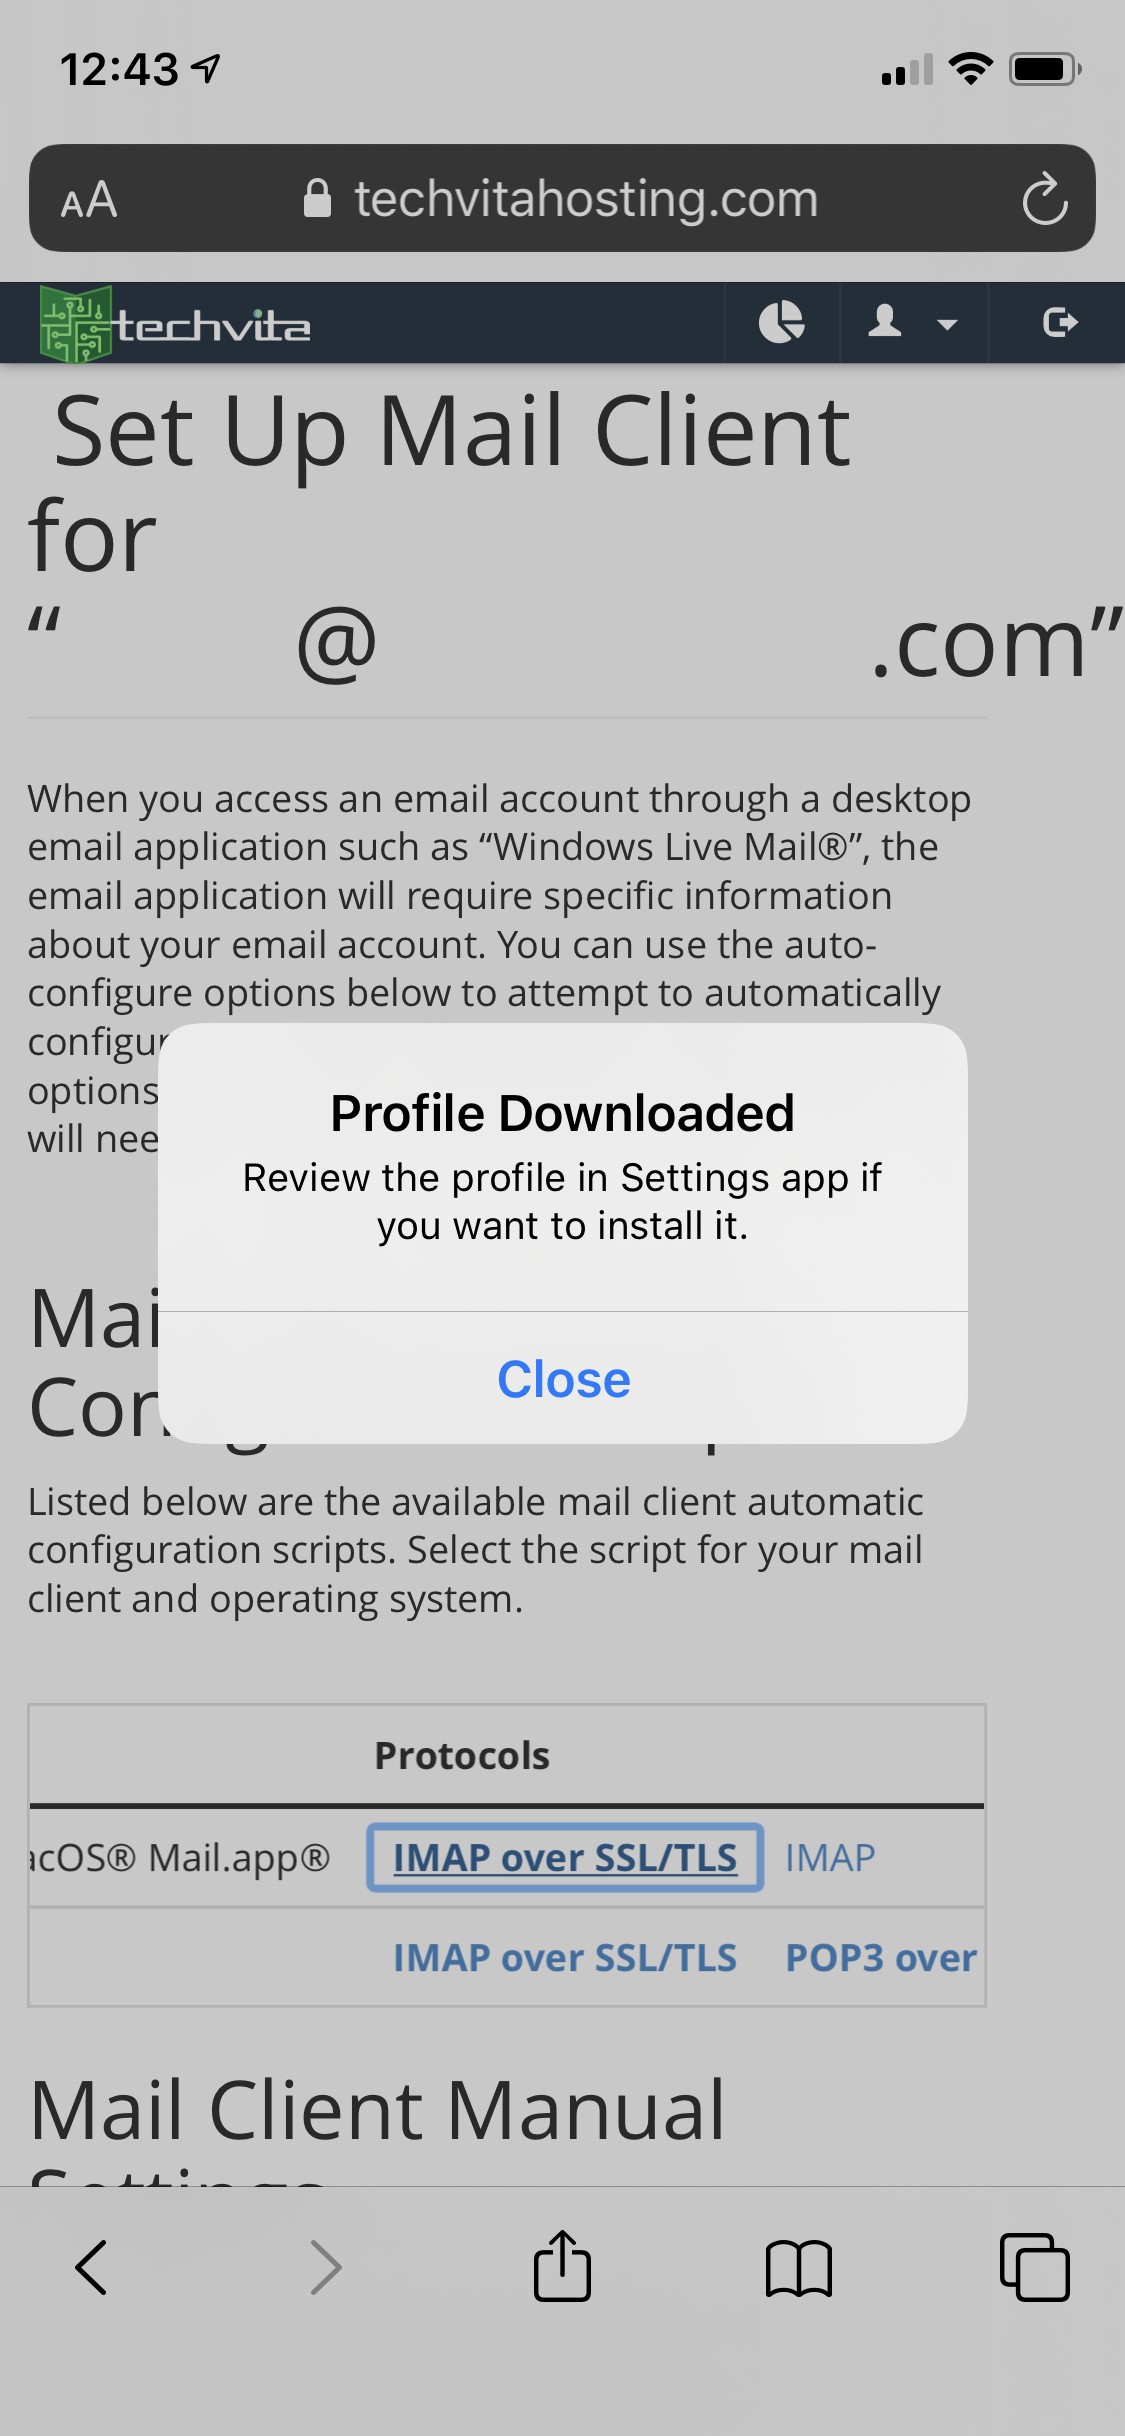
Step 6 Tap Allow to permit Safari to open Settings to install the configuration profile, then close once permitted to download |
|
|
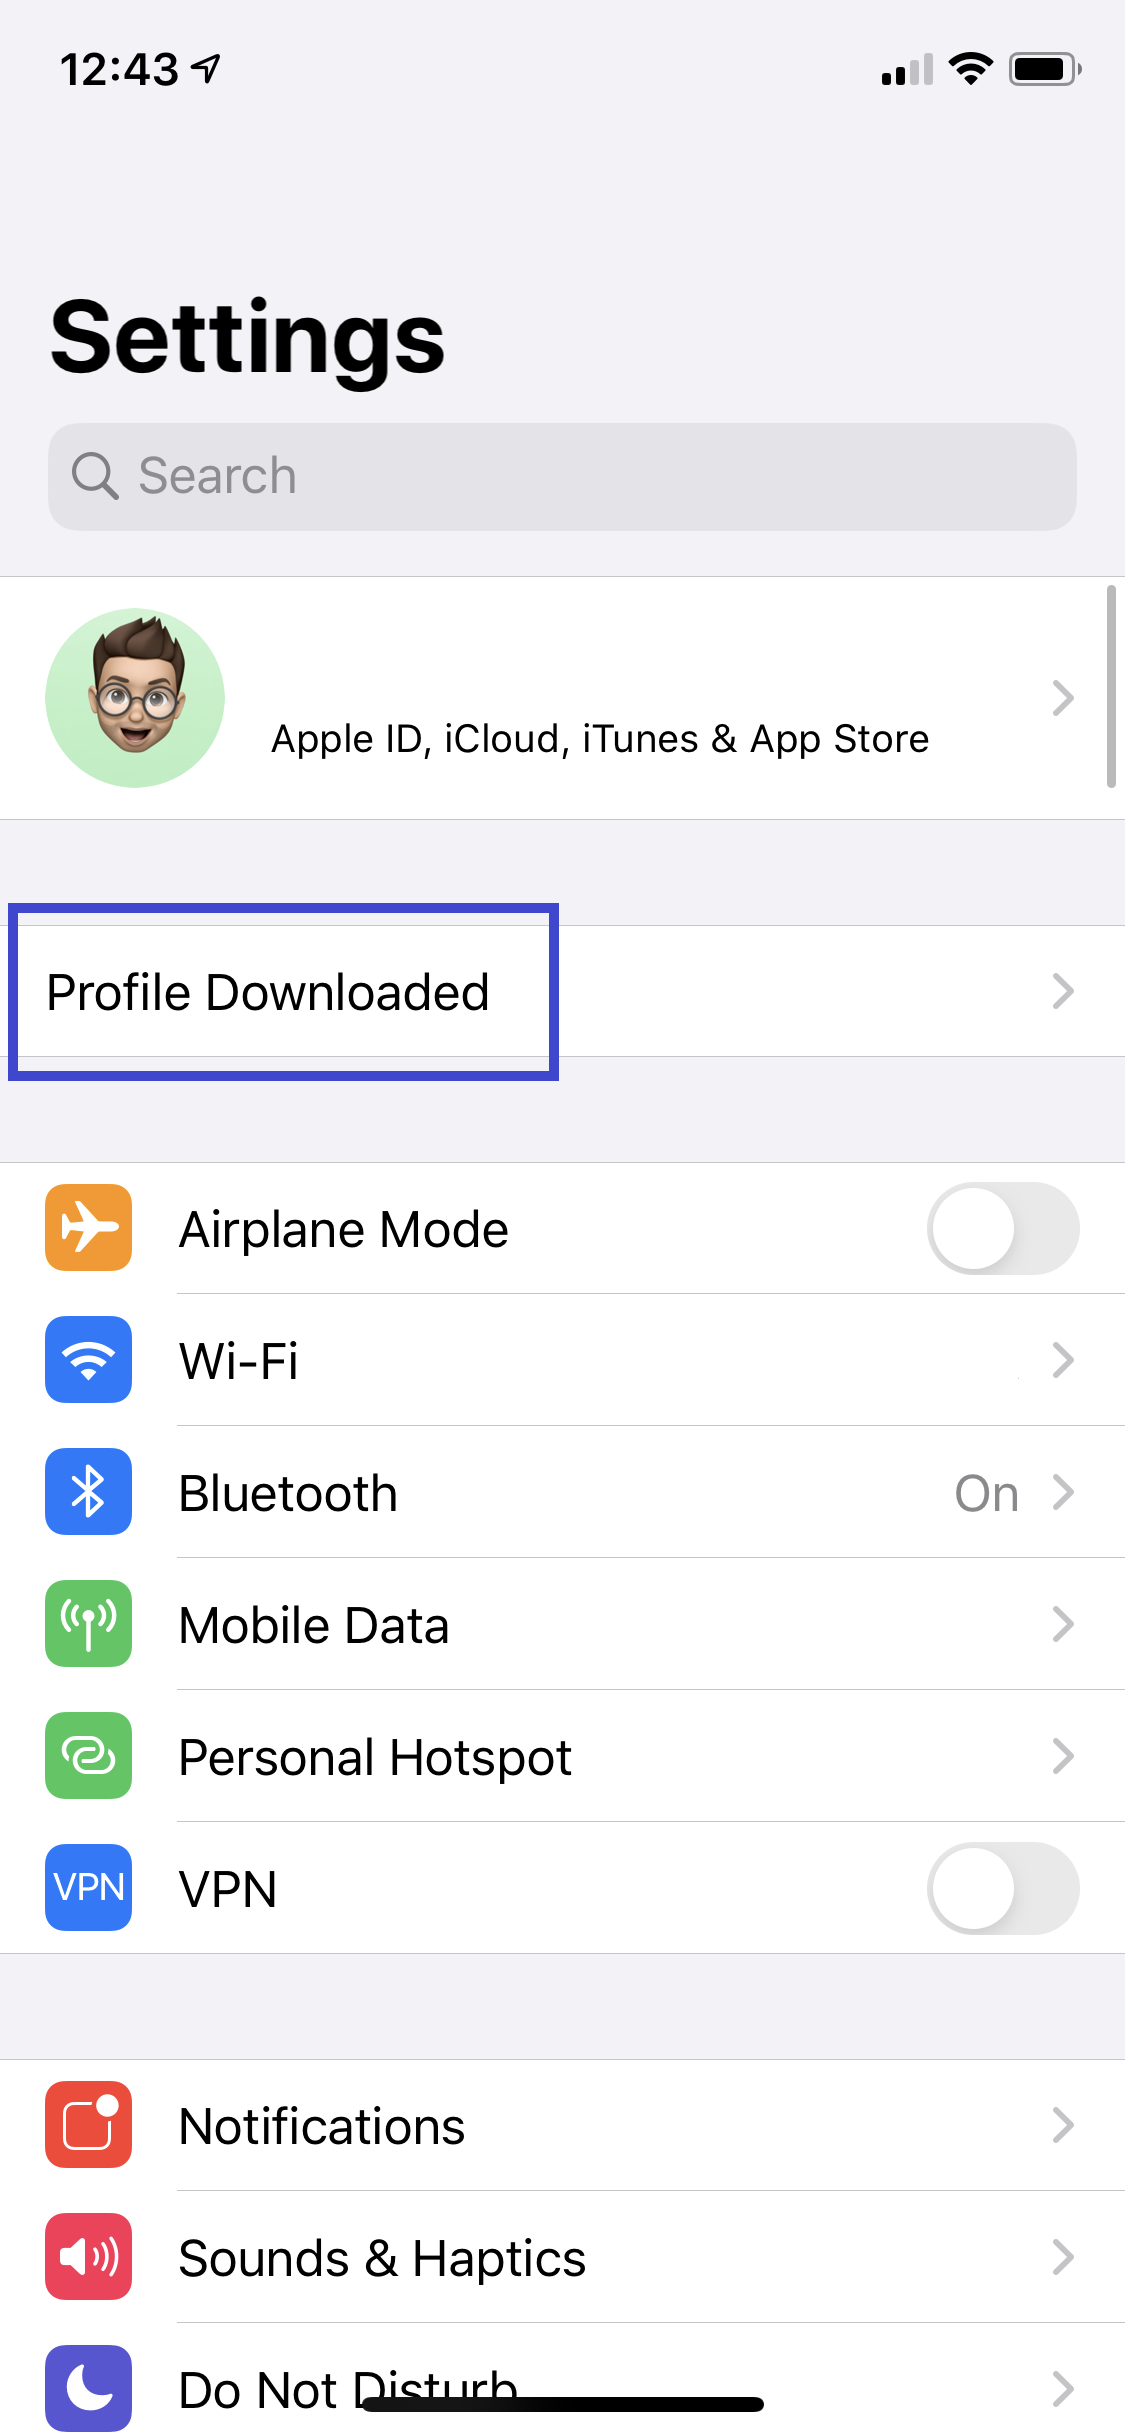
Step 7 Review the profile to be installed from device settings. Tap on 'Profile Downloaded'
|
 |
|
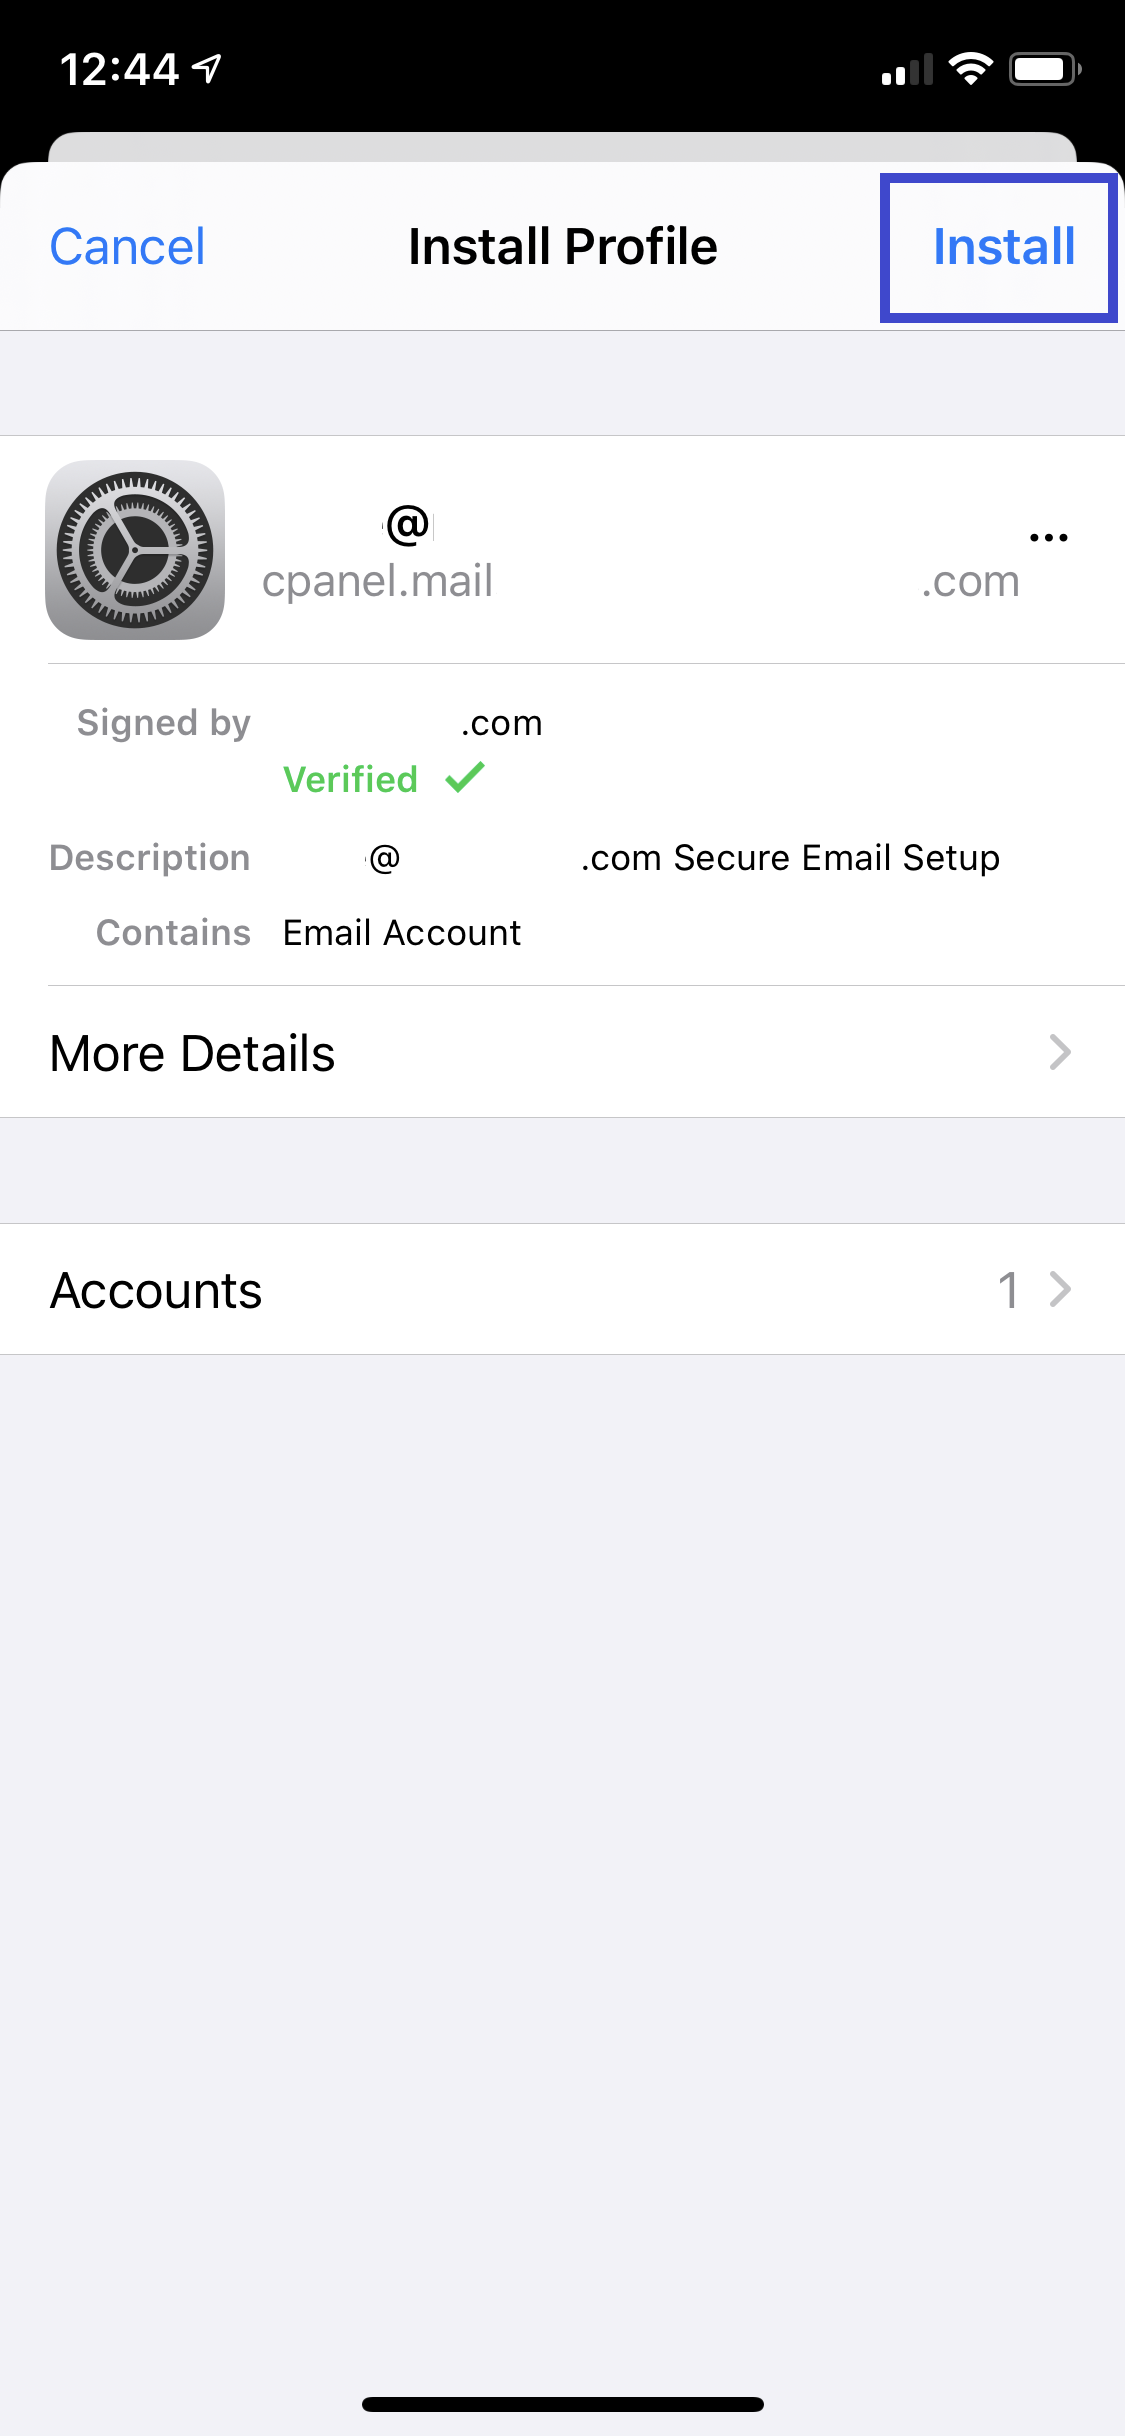
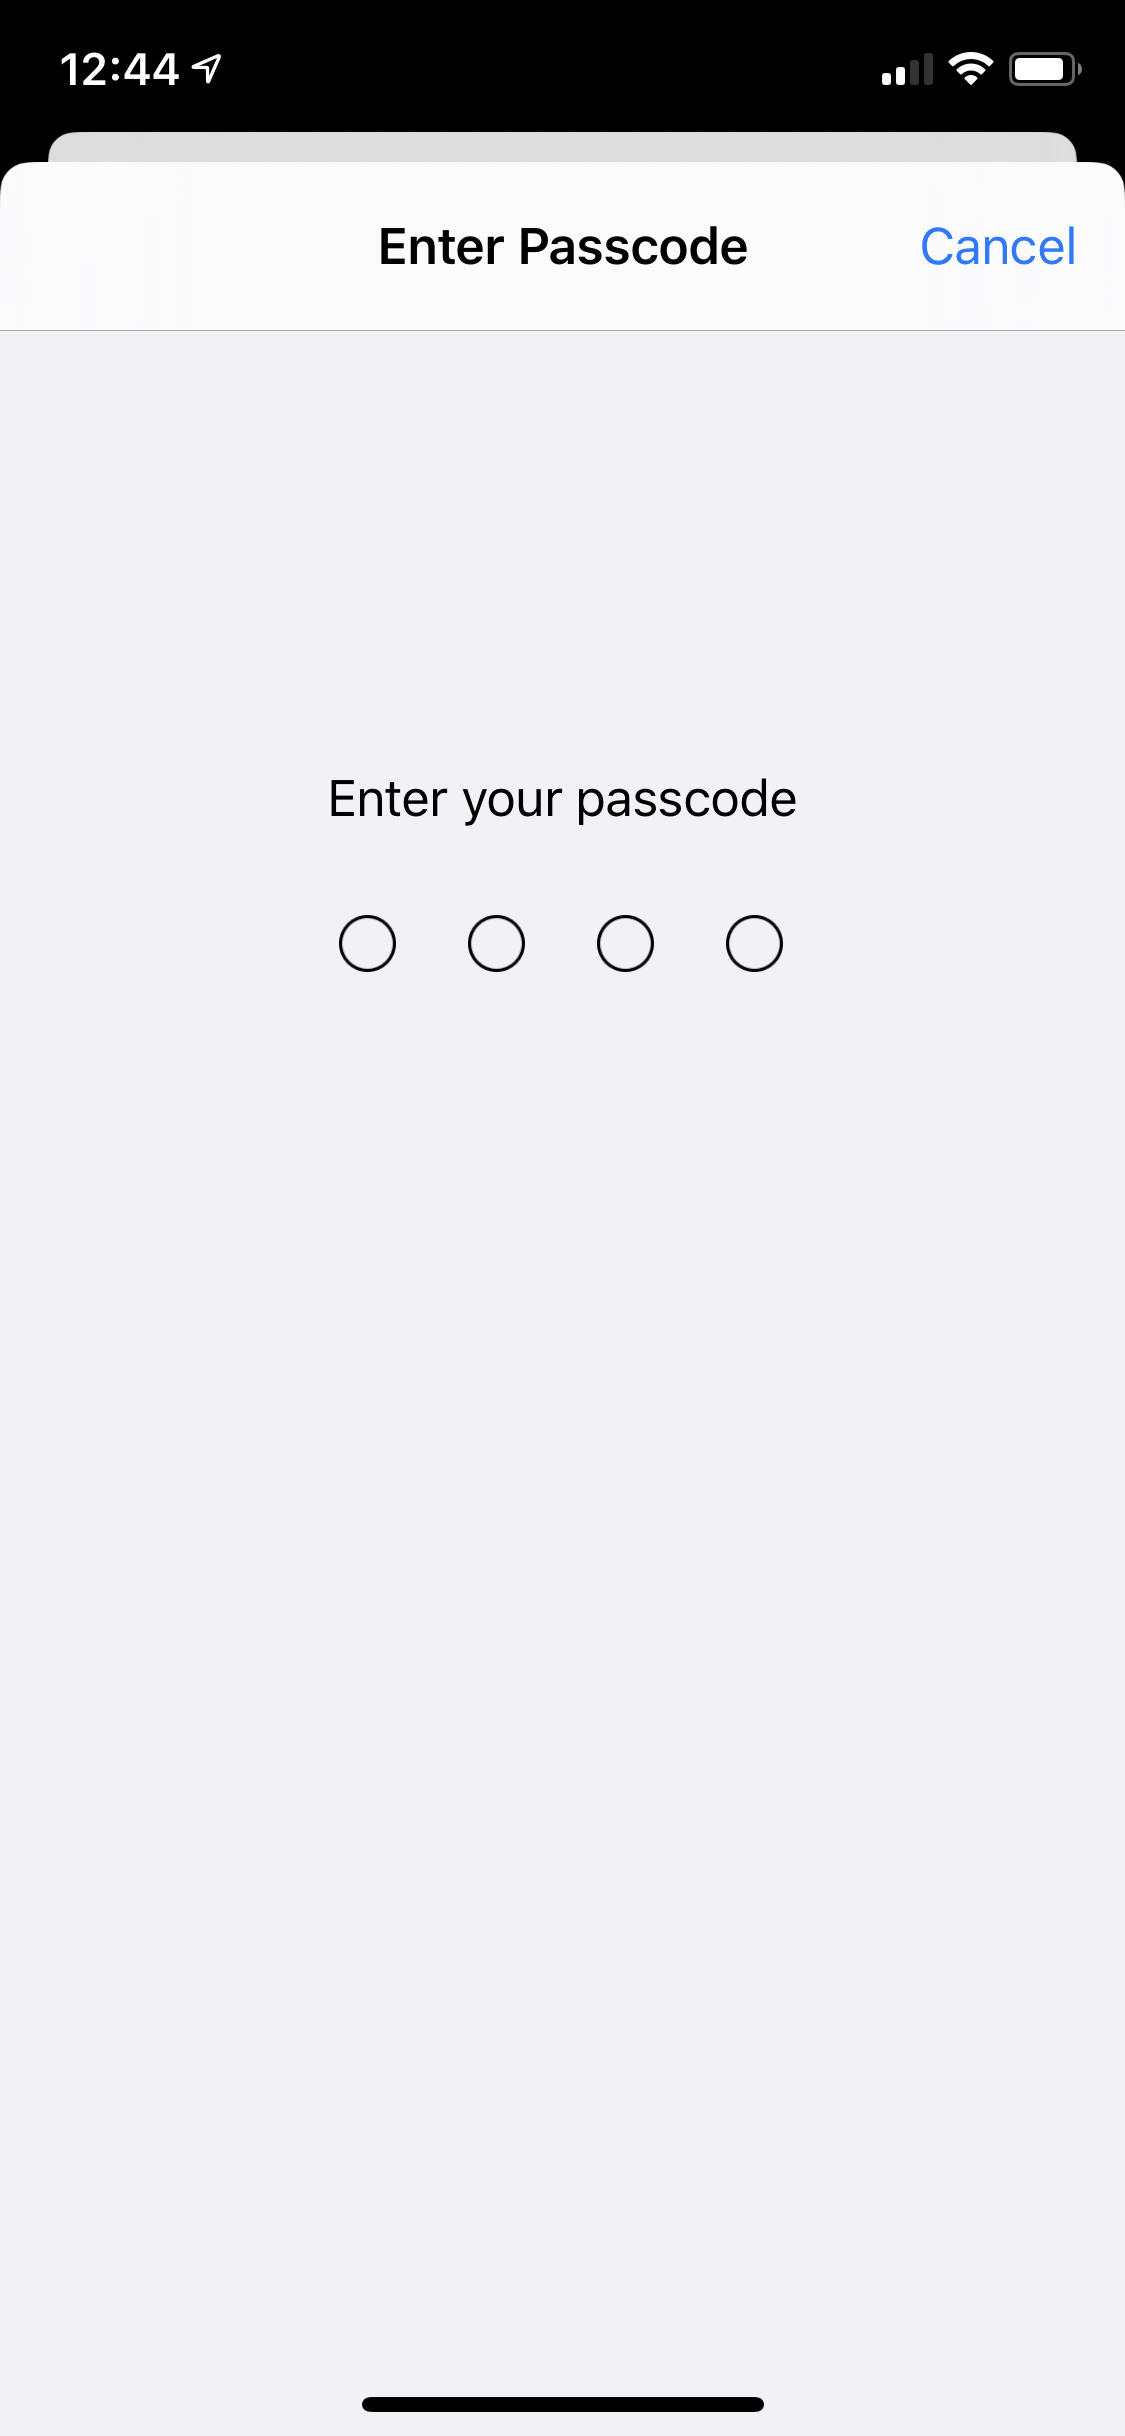
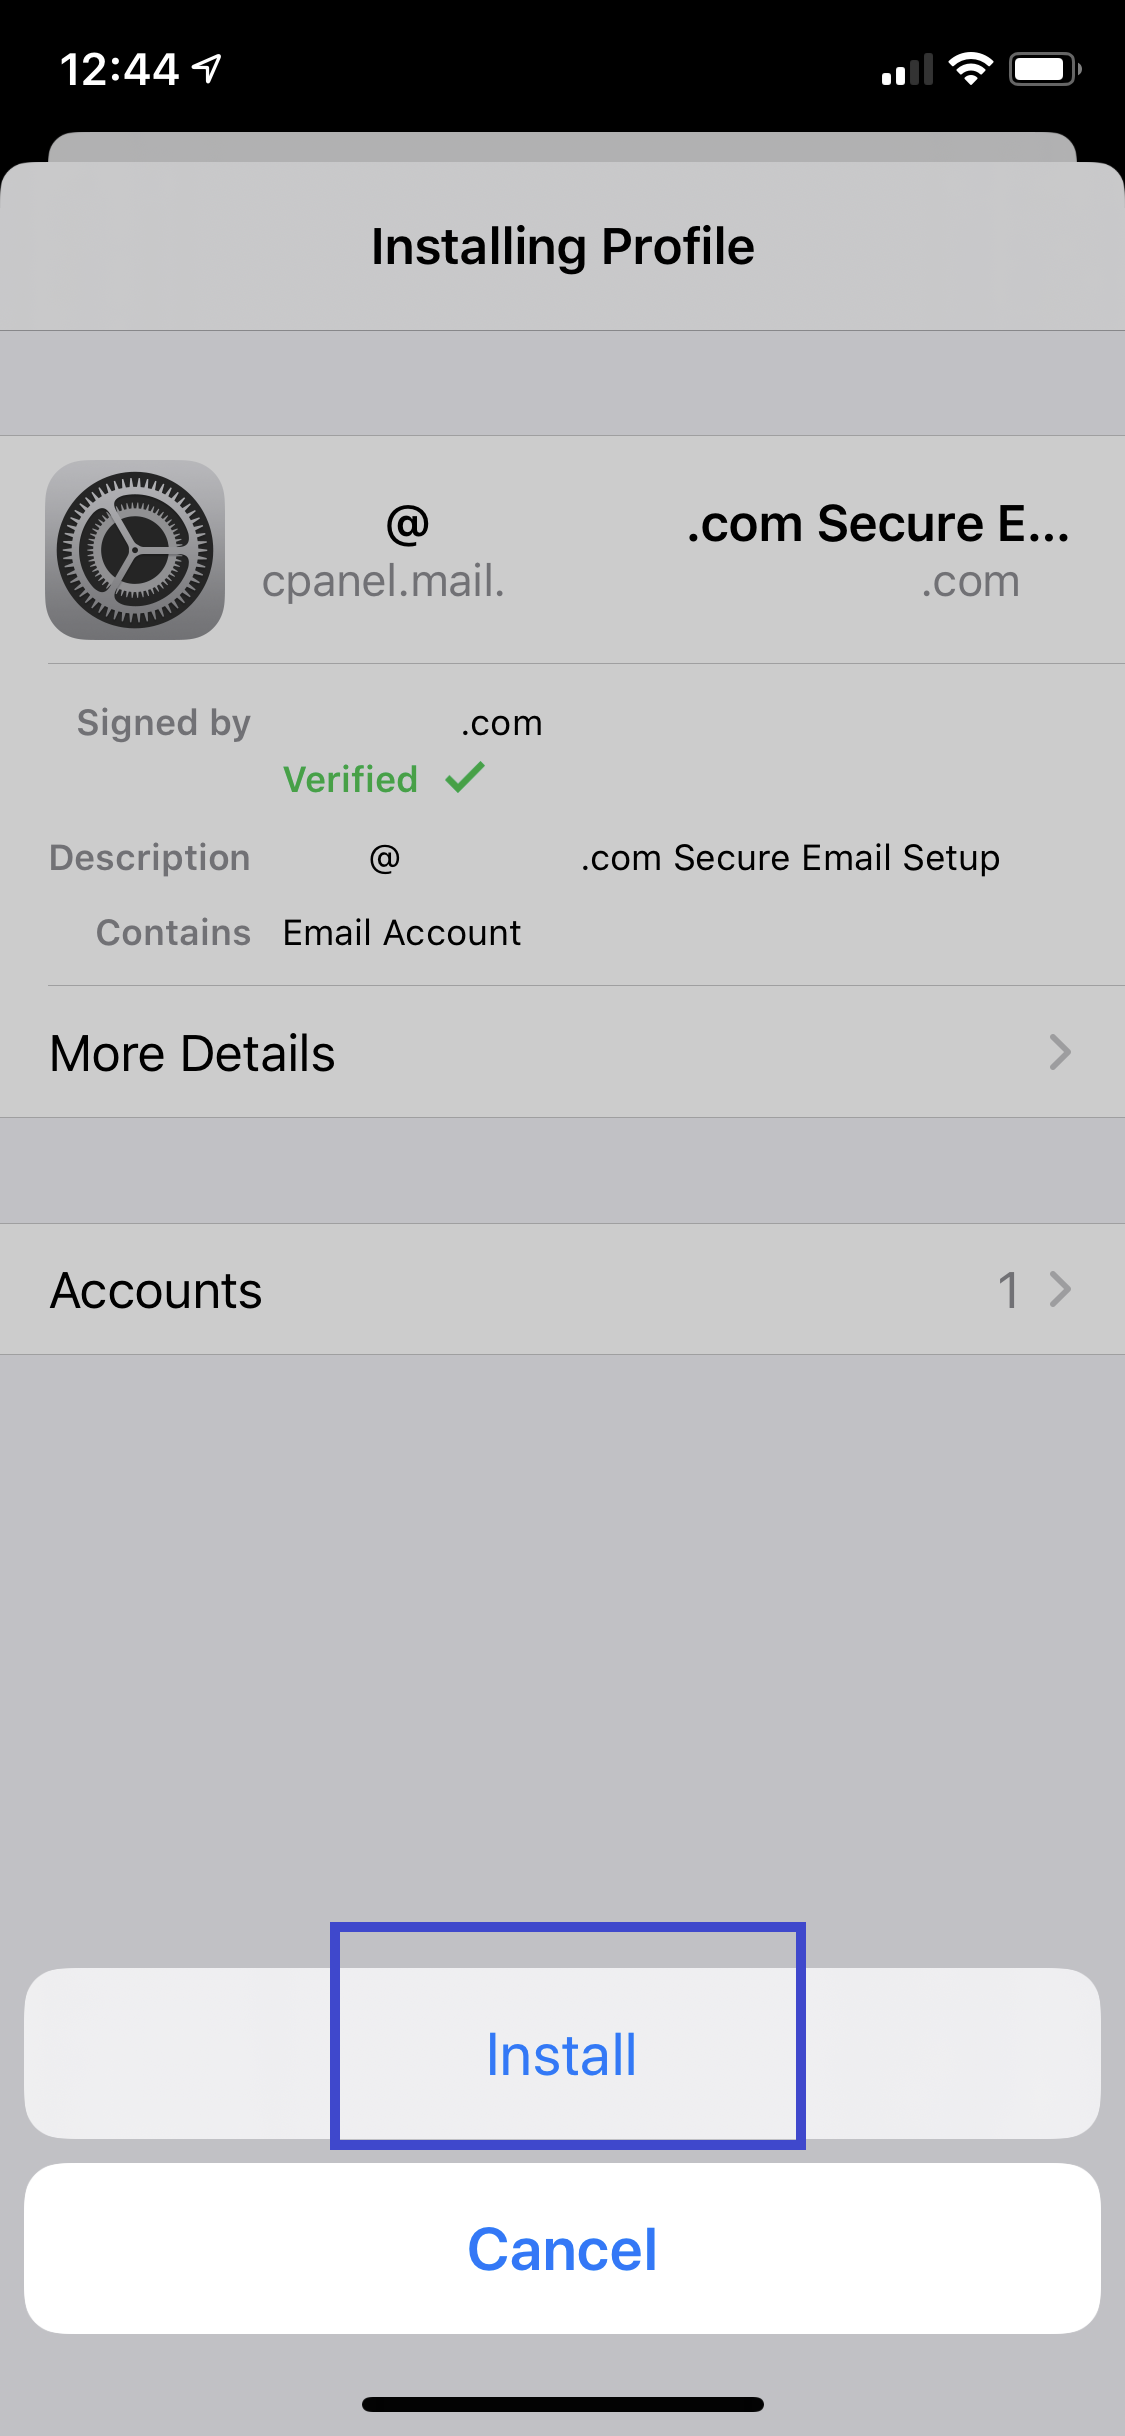
Step 8 Review and verify the Profile to be installed and tap Install. You may be asked for your device PIN at this stage, then finally tap on Install |
   |
|
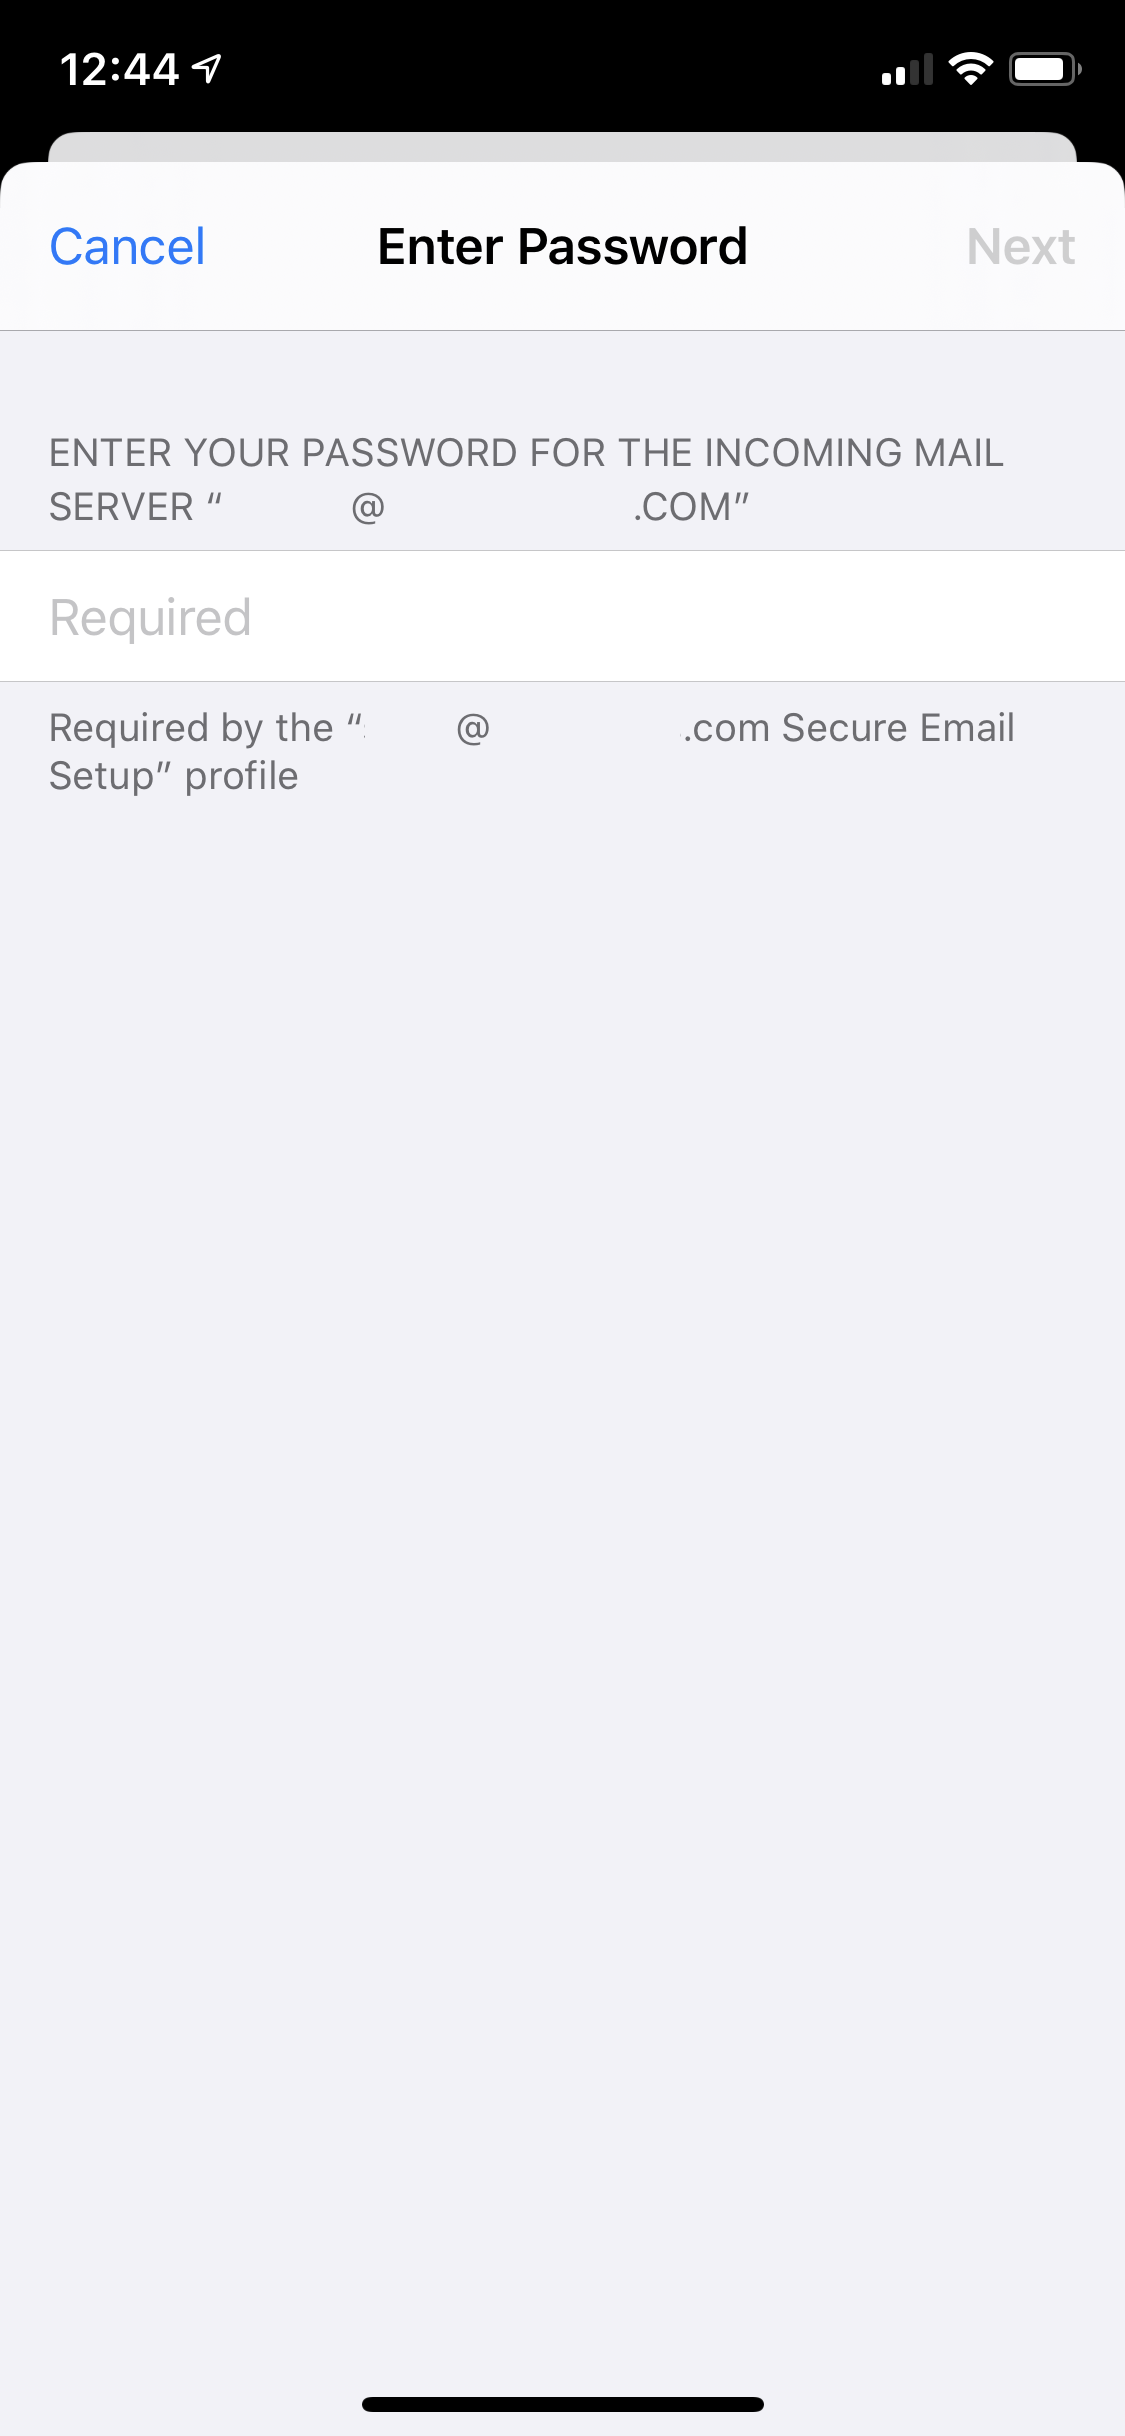
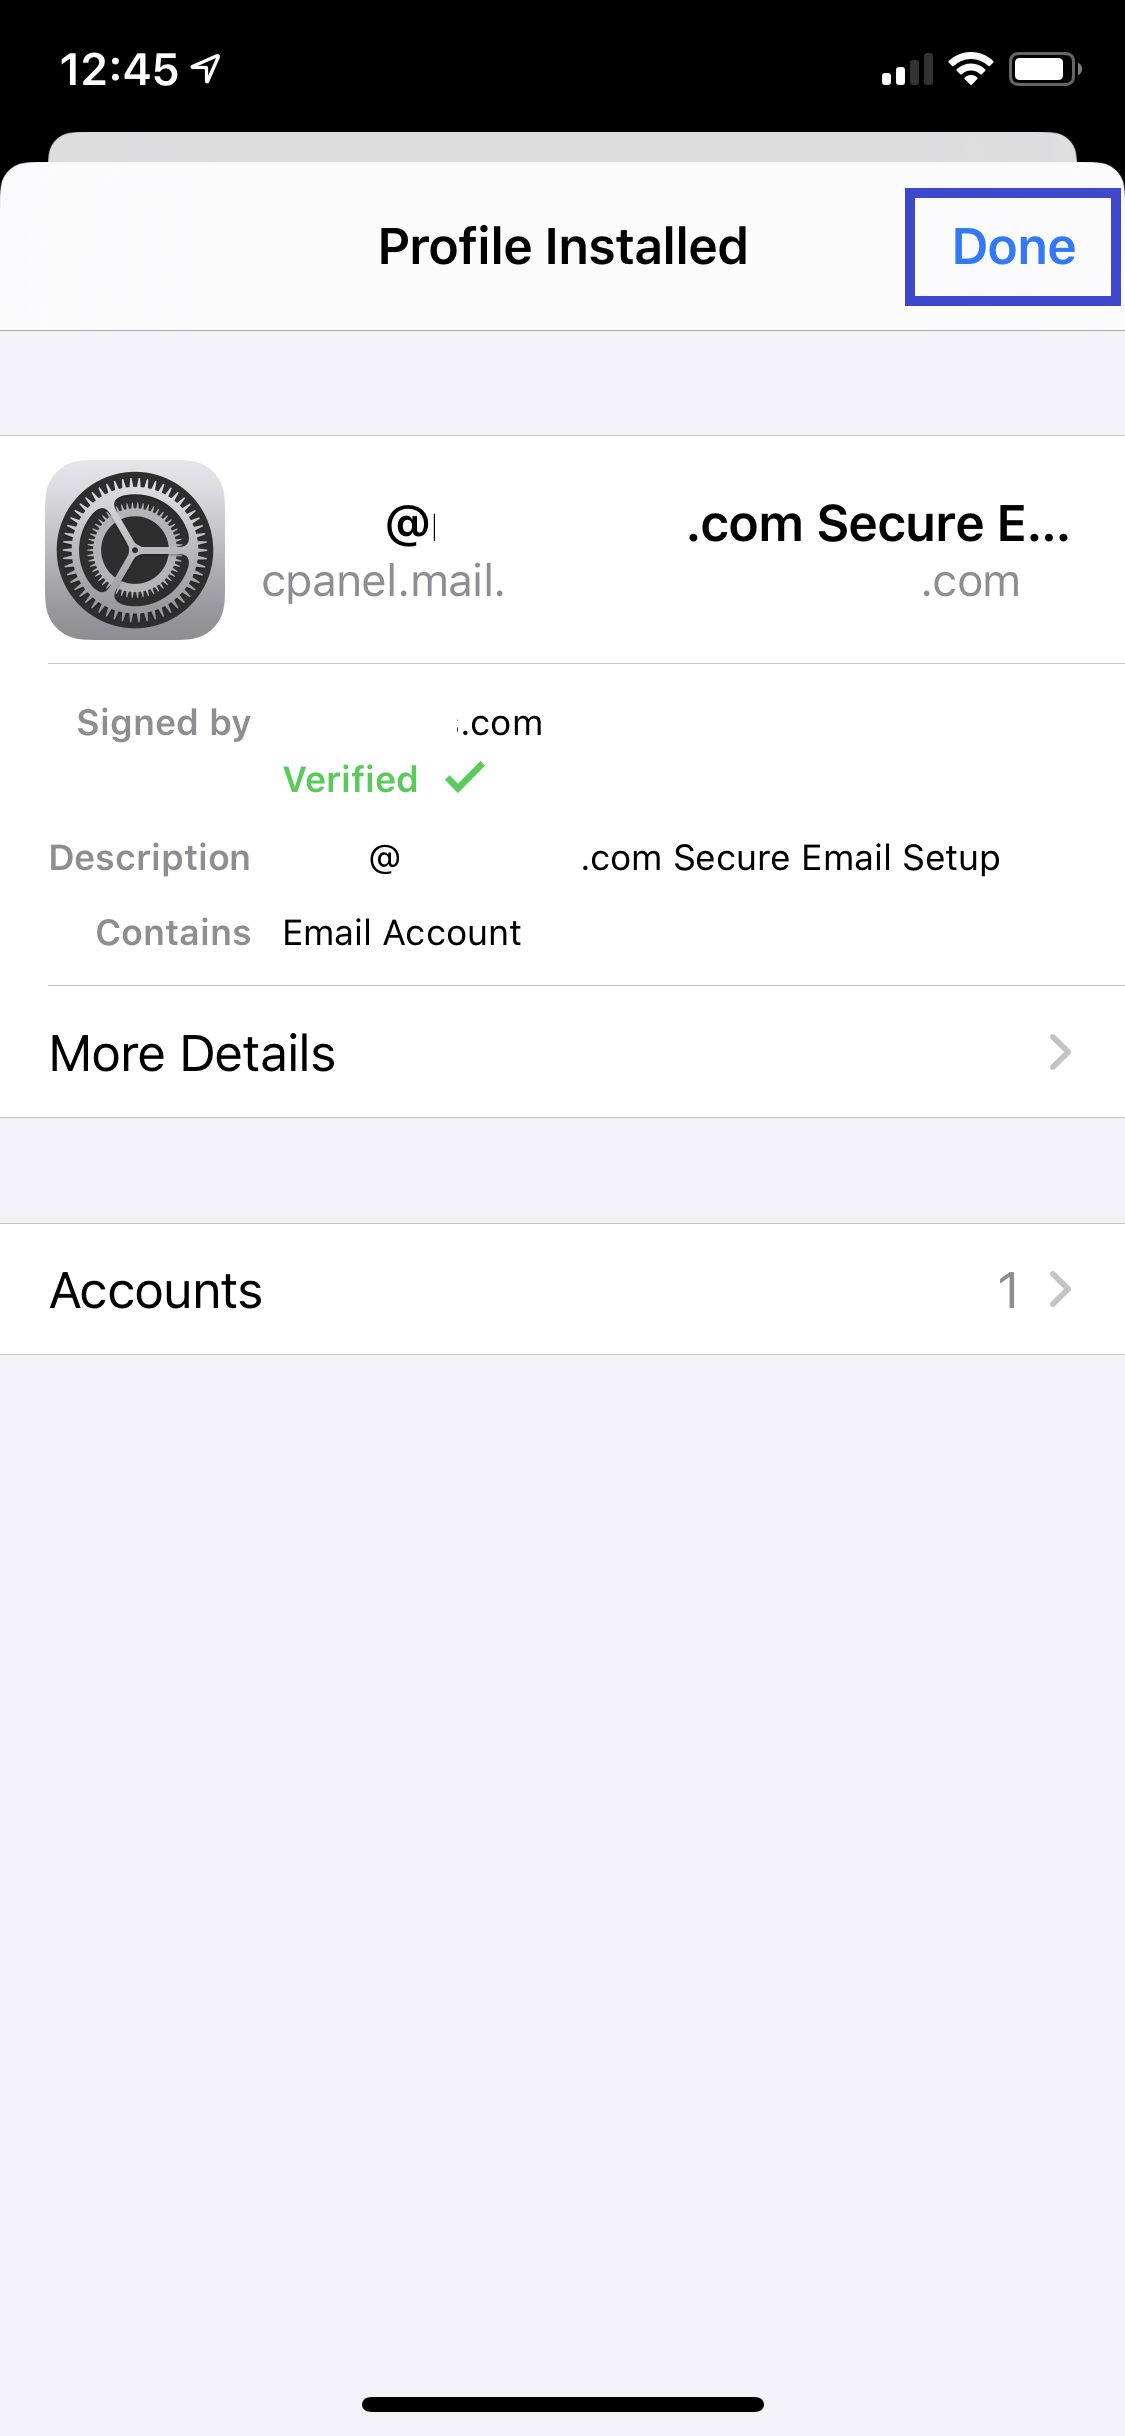
Step 9 Enter your email account’s password then tap Next, and to finish up finally tap Done |
  |
You should now have access to your emails on the go or on your Mac. These images clearly illustrate an iPhone being setup, however the same file can be installed and used on MacOS's Native Mail App also.
